
Mailing apps may look different across different devices, and these directions may not exactly match the options you see. Use these steps as a guide or consult the manufacturer's help for your particular device.
Choose the platform you want to set up your Caribbean New Media mail
Choose the Outlook Platform:
Guide to Outlook mail setup.
Microsoft Outlook is a part of Microsoft 365 (MS Office Suite) that can be used as a standalone application. You can set up your Caribbean New Media email account in Outlook on your computer or a mobile device. This guide will show you how to configure your Outlook Mail application to access email for your Caribbean New Media Account.
Requirements
Before you start be sure to have these handy:
- Email Address: The full email address for the mailbox you have set up in Plesk, e.g. yourname@caribbeannewmedia.com
- User Name: The full email address for the mailbox you have set up in Plesk, e.g. yourname@caribbeannewmedia.com
- POP3 Incoming Mail Port: 995
- IMAP Incoming Mail Port: 993
- POP3 & IMAP Outgoing Mail Port: 587
- Encryption Method: Auto
- Server: For Incoming and Outgoing Mail Servers use "mail.caribbeannewmedia.com"
- Password: The password you set in the mailbox preferences within Plesk.
1
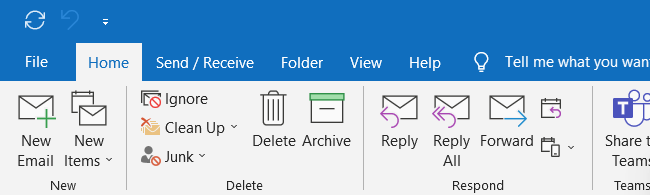
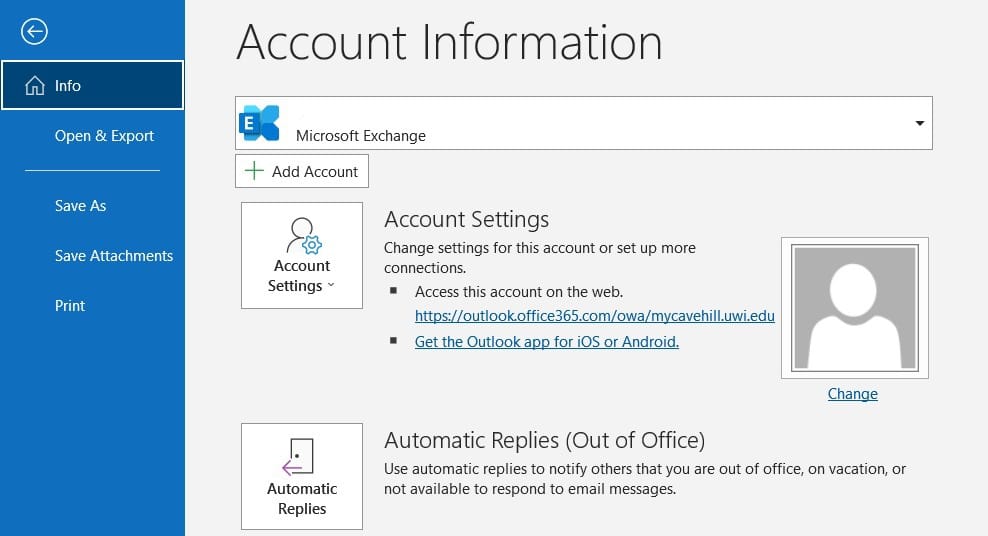
On your desktop open the Outlook app. When the app is opened, click File from the tab menu. On the File tab, an off-canvas menu will appear from the left. click on the + Add Account.
2
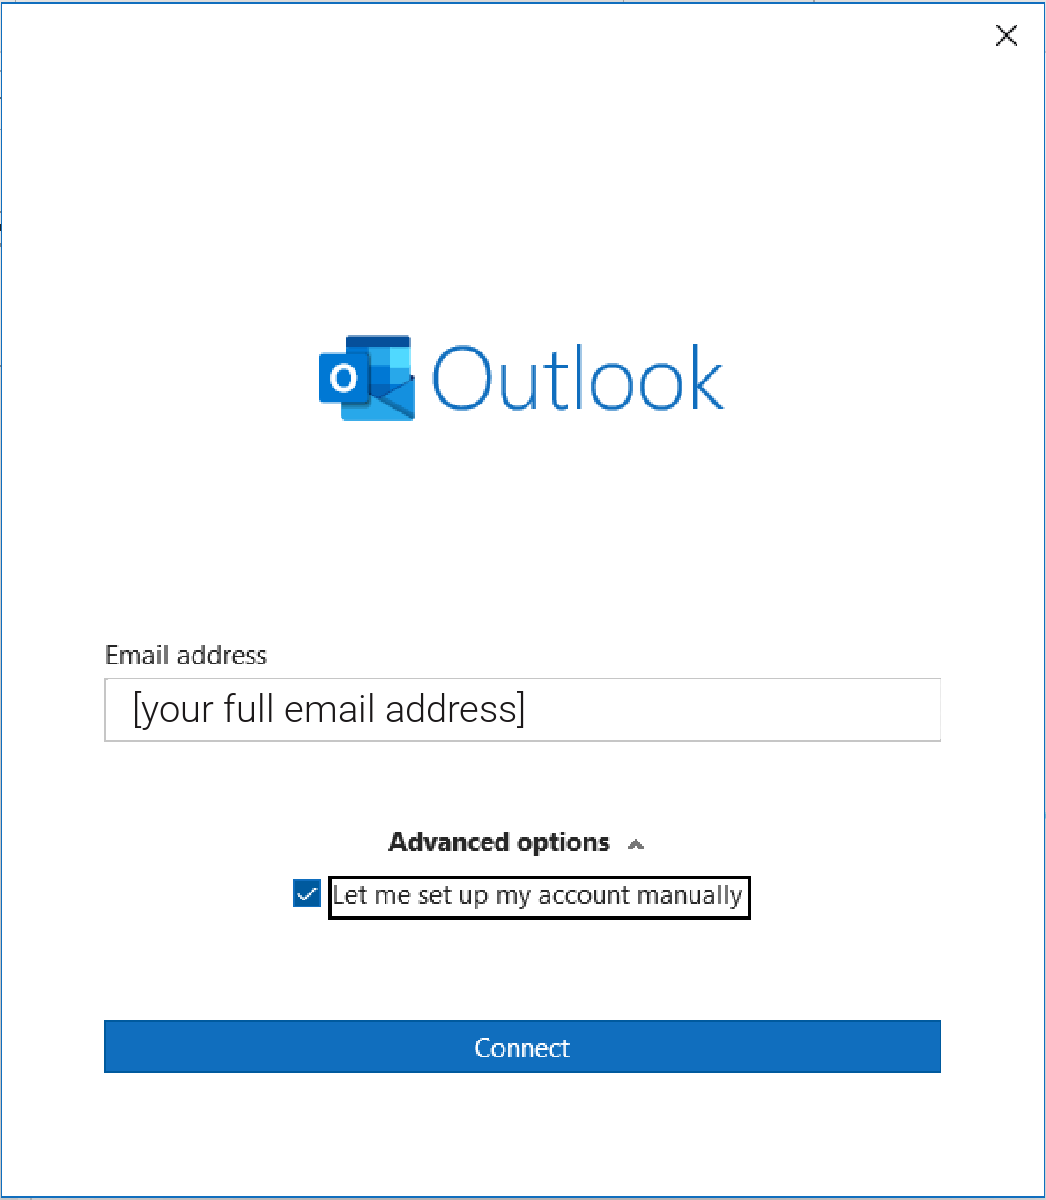
After clicking + Add Account, you will be presented with a pop screen. Add your Caribbean New Media (CNM) email address. Click Advanced options and check the box allowing you to set the account up manually. You will be taken to an Advance setup window.
3
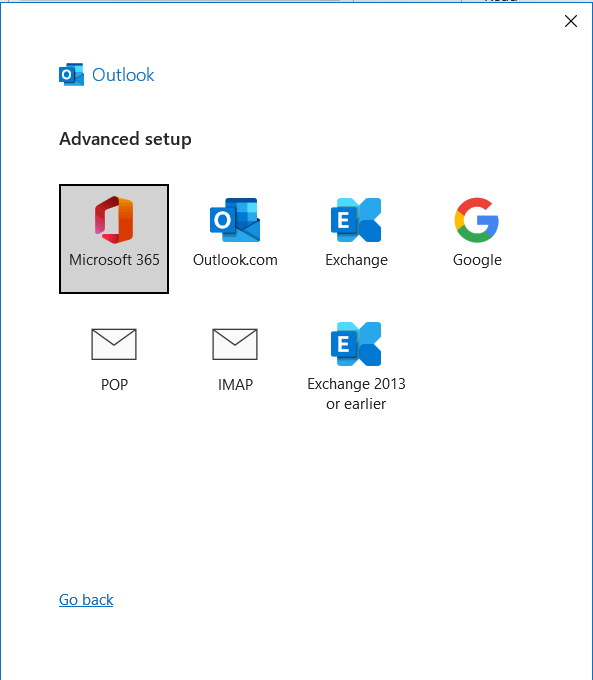
On the Advanced setup screen, click on the option POP or IMAP. You will then be taken to an add password window.
4
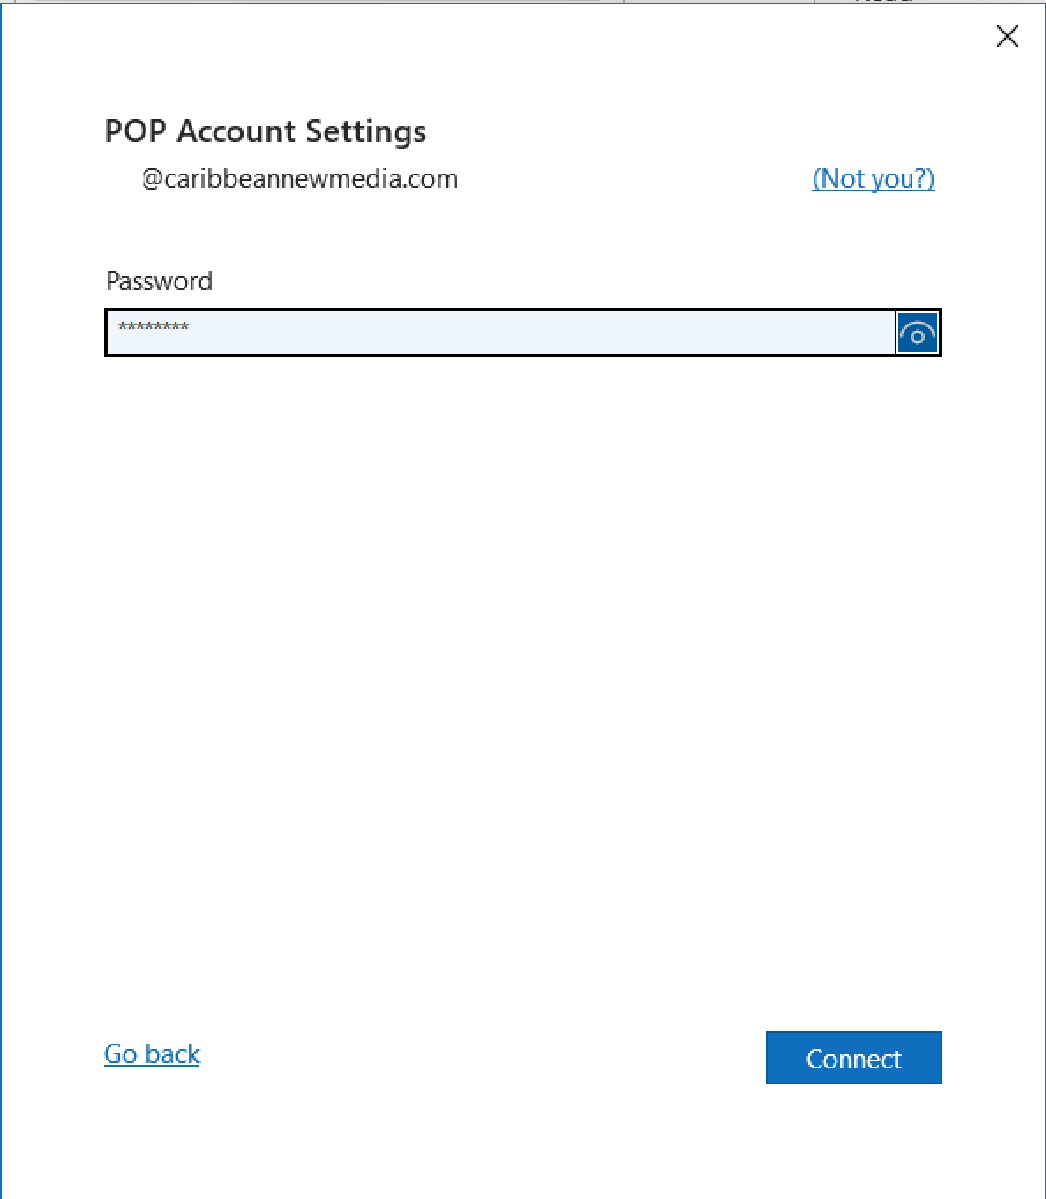
On the Password window, ensure the email address is correct then add the password and click Connect. You will then be taken to the POP Account Settings or IMAP Account Settings window.

5
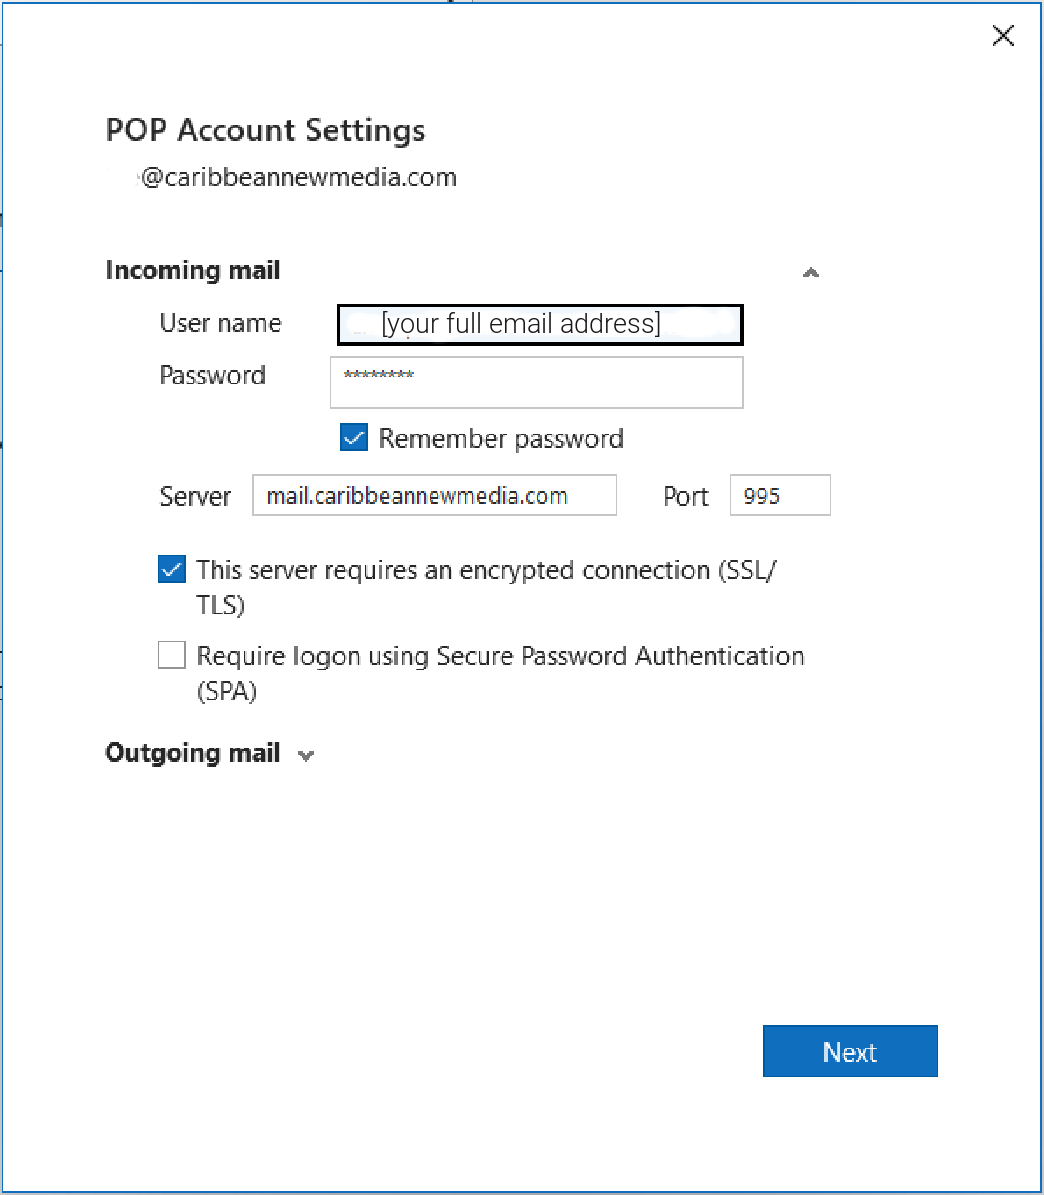
On the POP Account Settings window under Incoming mail, the username and password fields will be already filled but ensure they are correct. For the server and port fields type in and ensure they match the image below. Additionally, check the box labelled This server requires an encrypted connection (SSL/TLS). After filling in all necessary information for the Incoming mail, click Outgoing mail to collapse the fields.
6
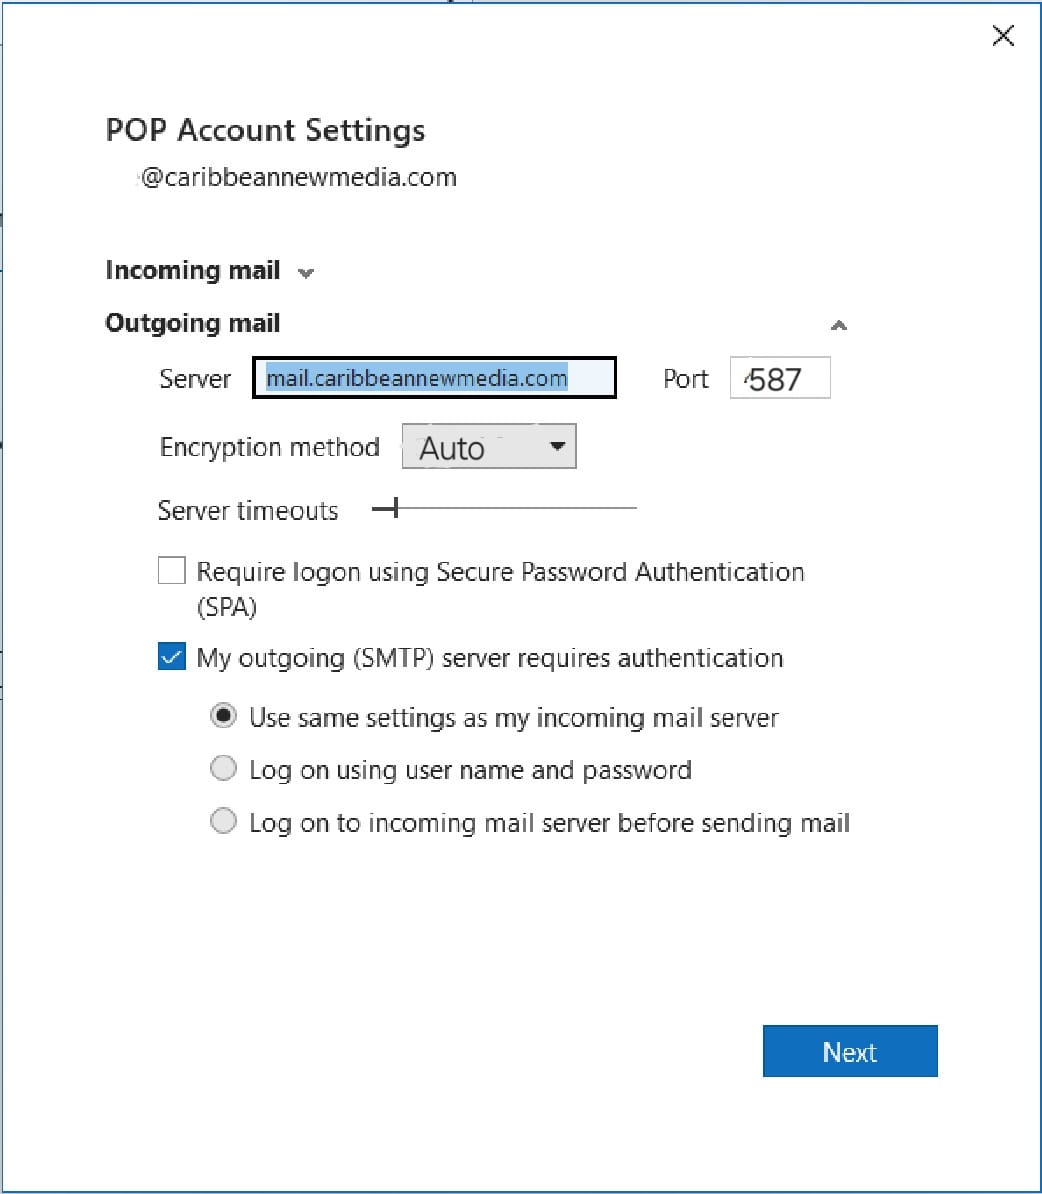
Under the Outgoing mail, populate each field with the information provided in the image below. The Encryption method should be set to Auto. Every other field should be set by default. Click Next to advance to the next window.
7
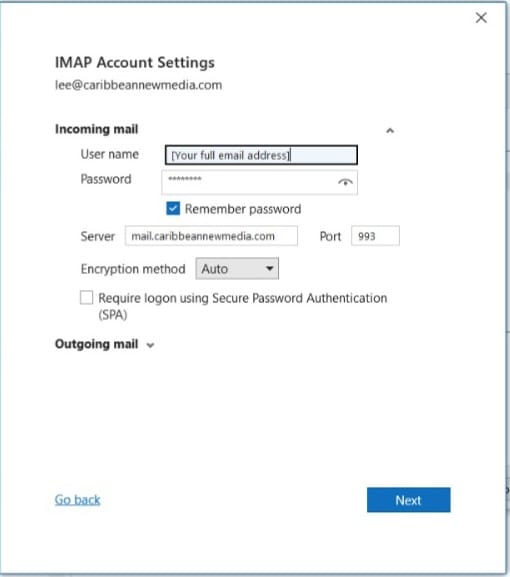
On the IMAP Account Settings window under Incoming mail, the username and password fields will be already filled but ensure they are correct. For the server and port fields type in and ensure they match the image below. Additionally, check the box labelled This server requires an encrypted connection (SSL/TLS). After filling in all necessary information for the Incoming mail, click Outgoing mail to collapse the fields.
8
Under the Outgoing mail, populate each field with the information provided in the image below. The Encryption method should be set to Auto. Every other field should be set by default. Click Next to advance to the next window.

9
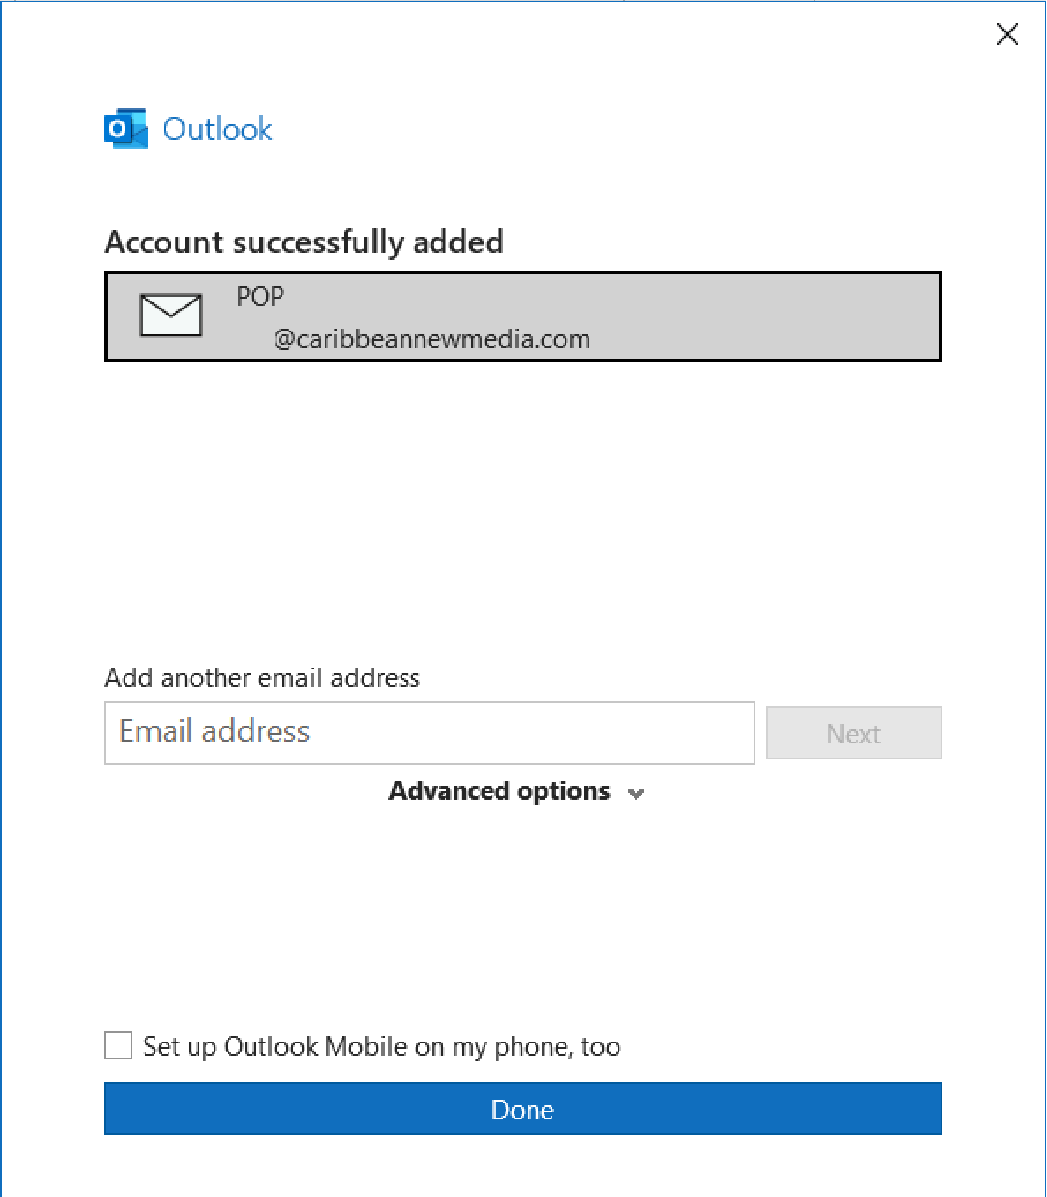
If all the steps were followed correctly and the user account does exist, the user account should have been added successfully. Uncheck the checkbox labelled Set up Outlook Mobile on my phone, too, and then click Done. You should be taken to your mailbox, where your inbox begins populating.
10
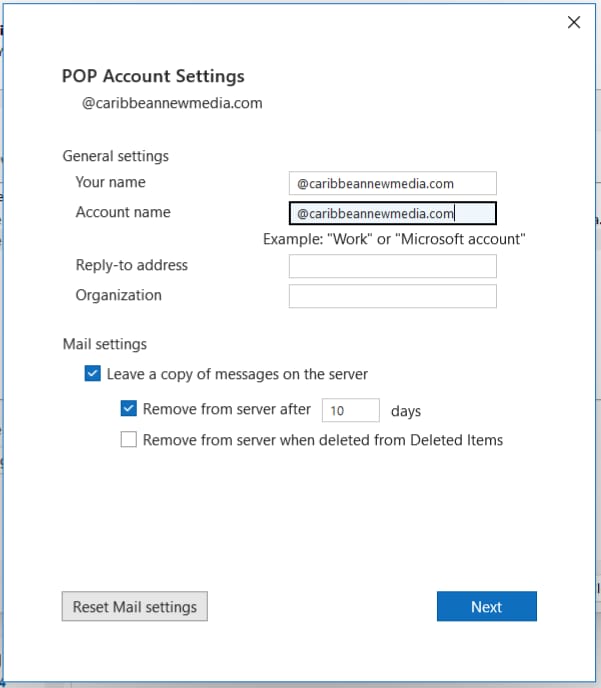
Finally, go to your new email account settings. If you plan on using Webmail, it is advisable to check the "Leave a copy of messages on the server" box and then set the "Remove from server after" to 10 days.
1
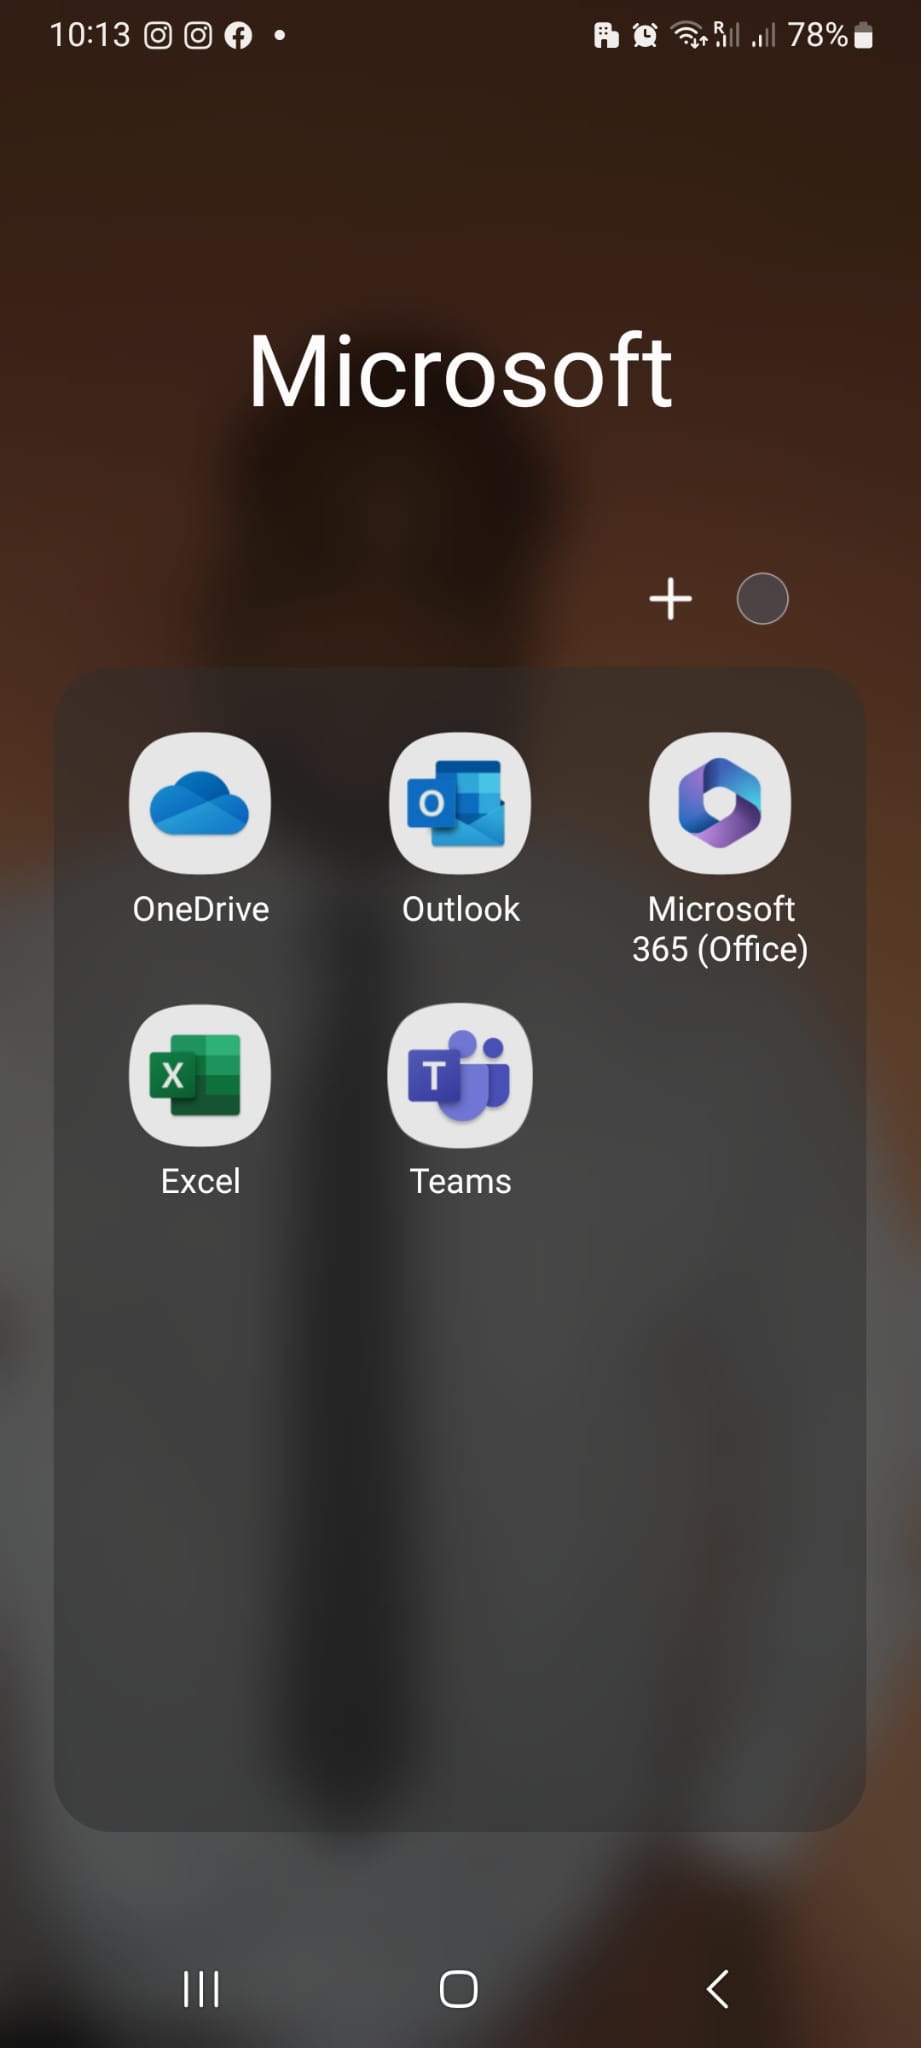
On your mobile device search for the Outlook App and tap to open. For Android users, the app can be found in Outlook Android. For IOS/Apple users the app can be found at Apple Outlook.
2
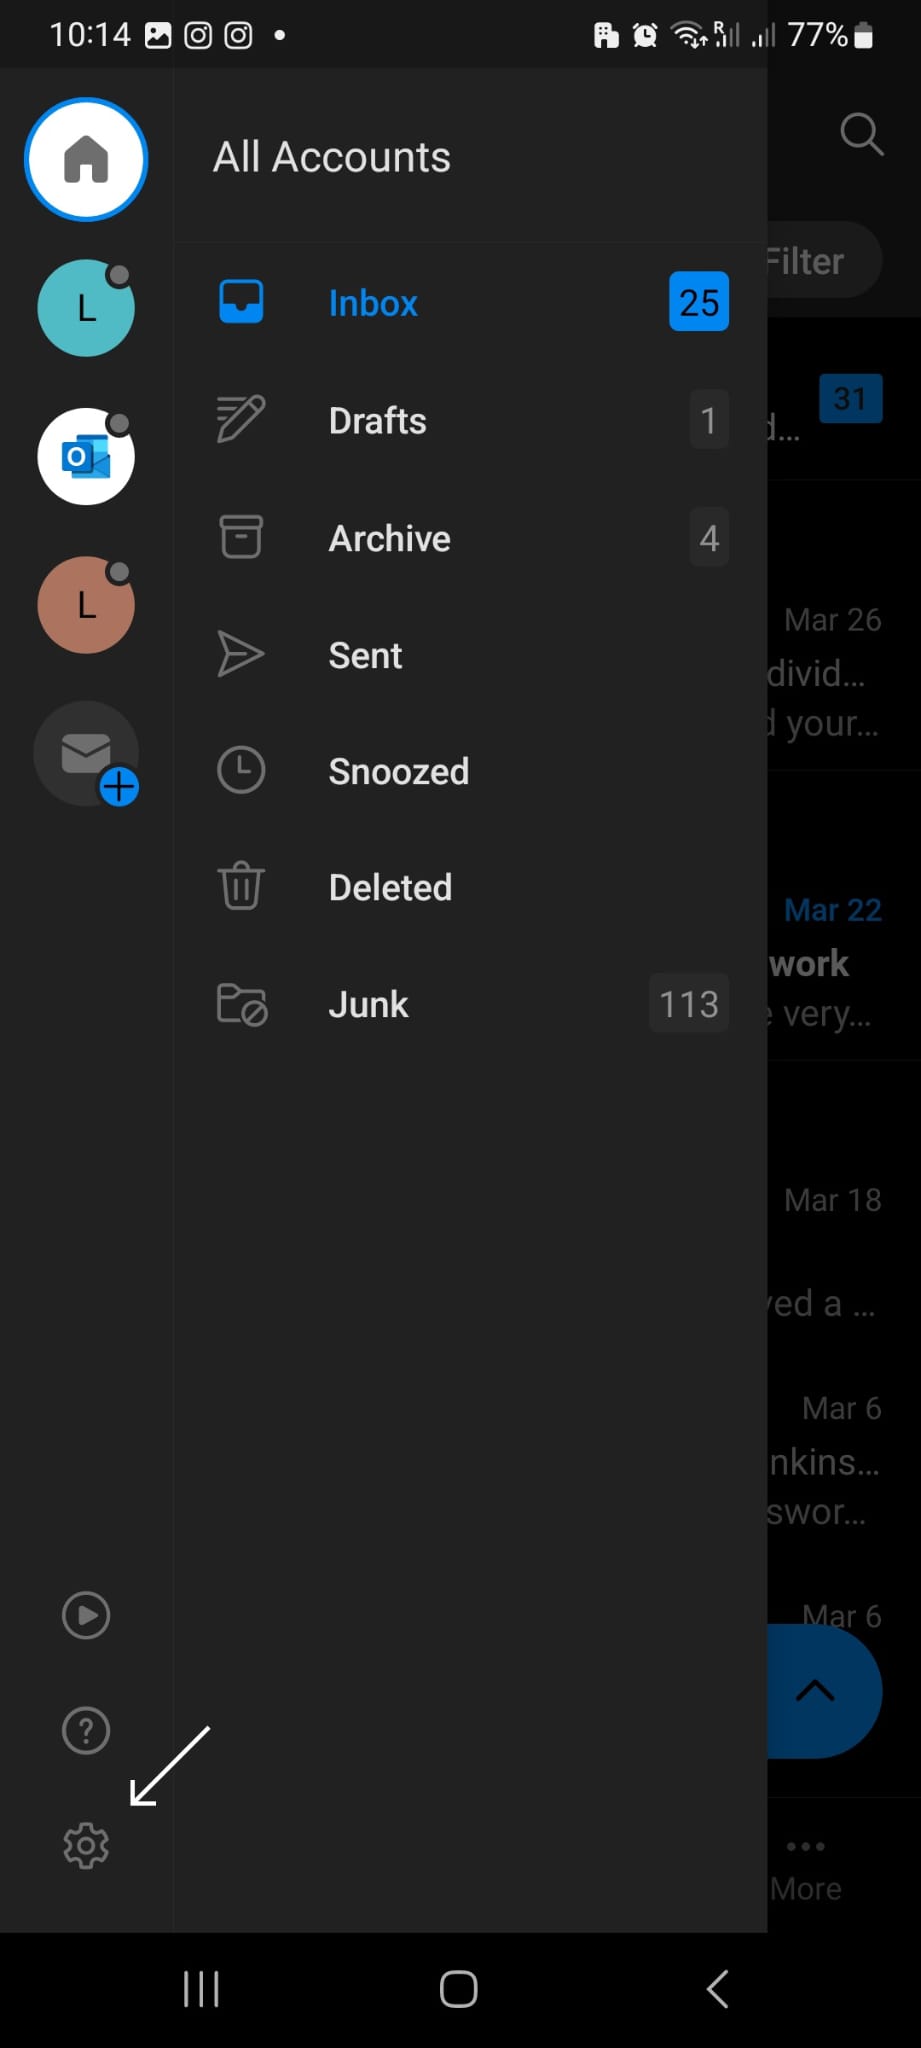
On the Outlook app tap the Home Icon located on the top left of the screen. An off-canvas menu will open from the left.
3
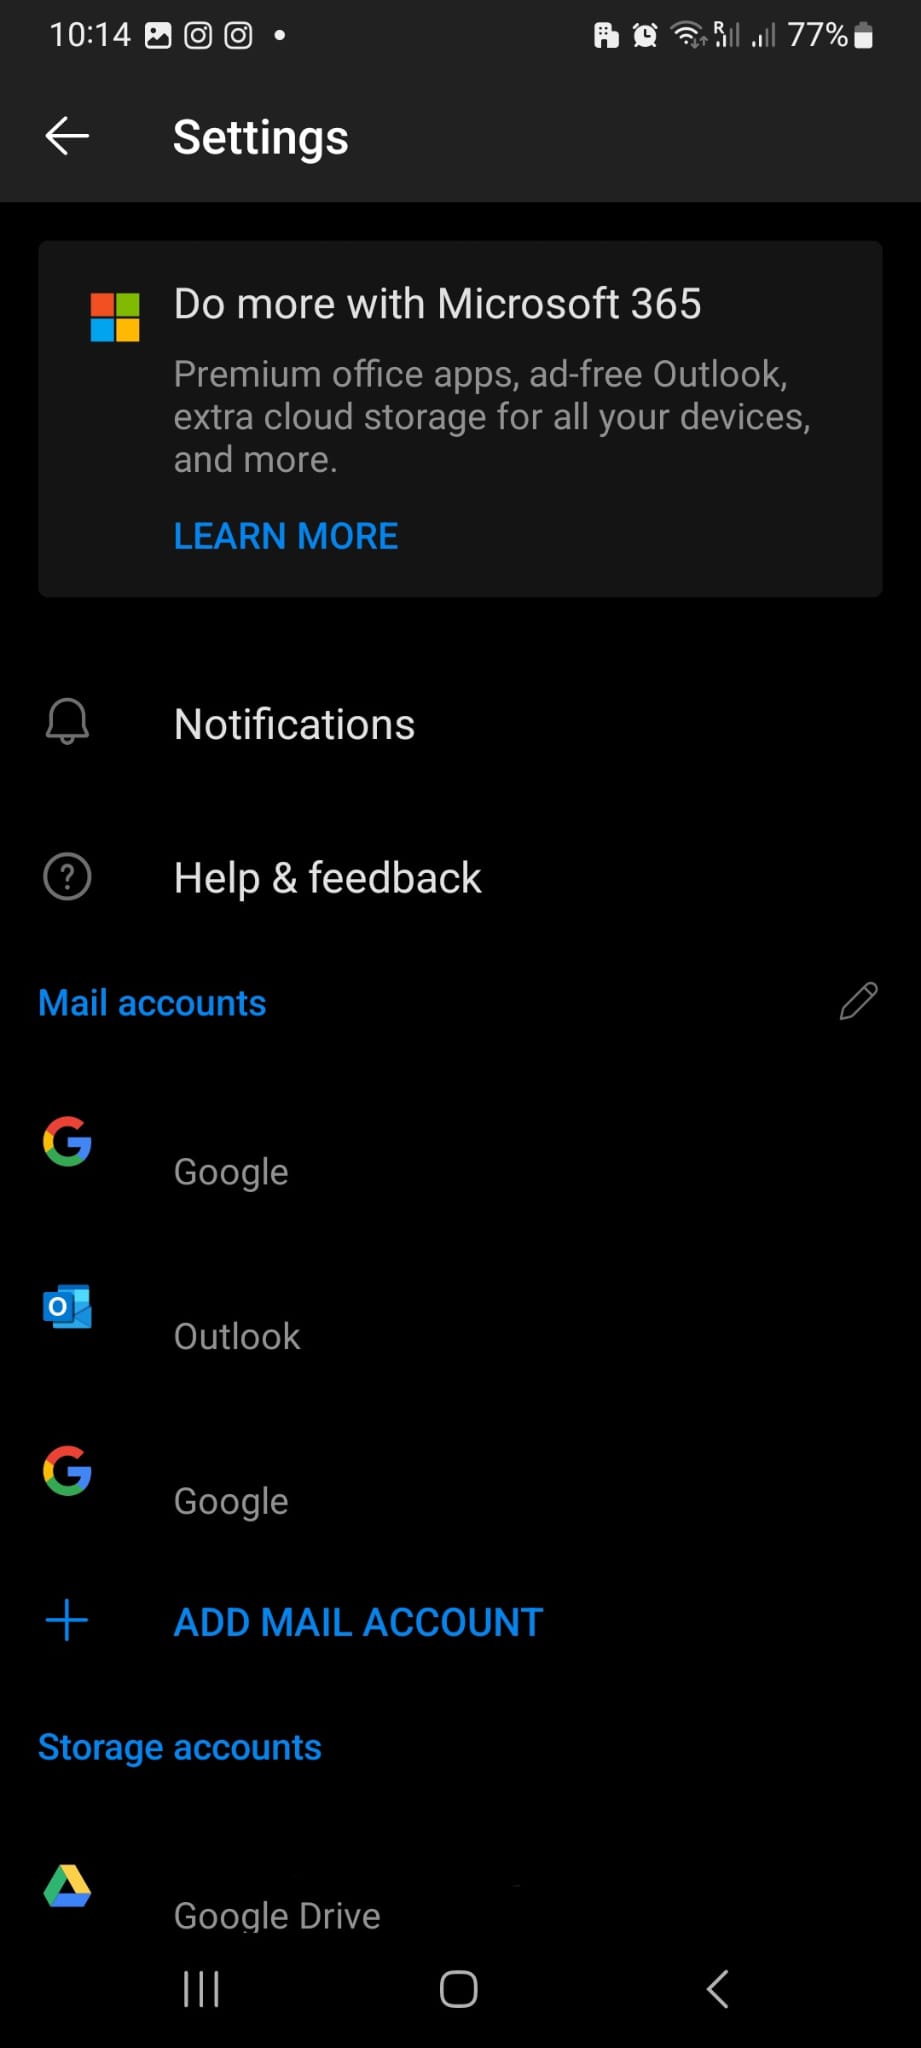
On the menu, tap the ⚙ on the bottom left of the screen. This will take you to the Settings screen.
4
On the Settings screen tap + ADD MAIL ACCOUNT.
5
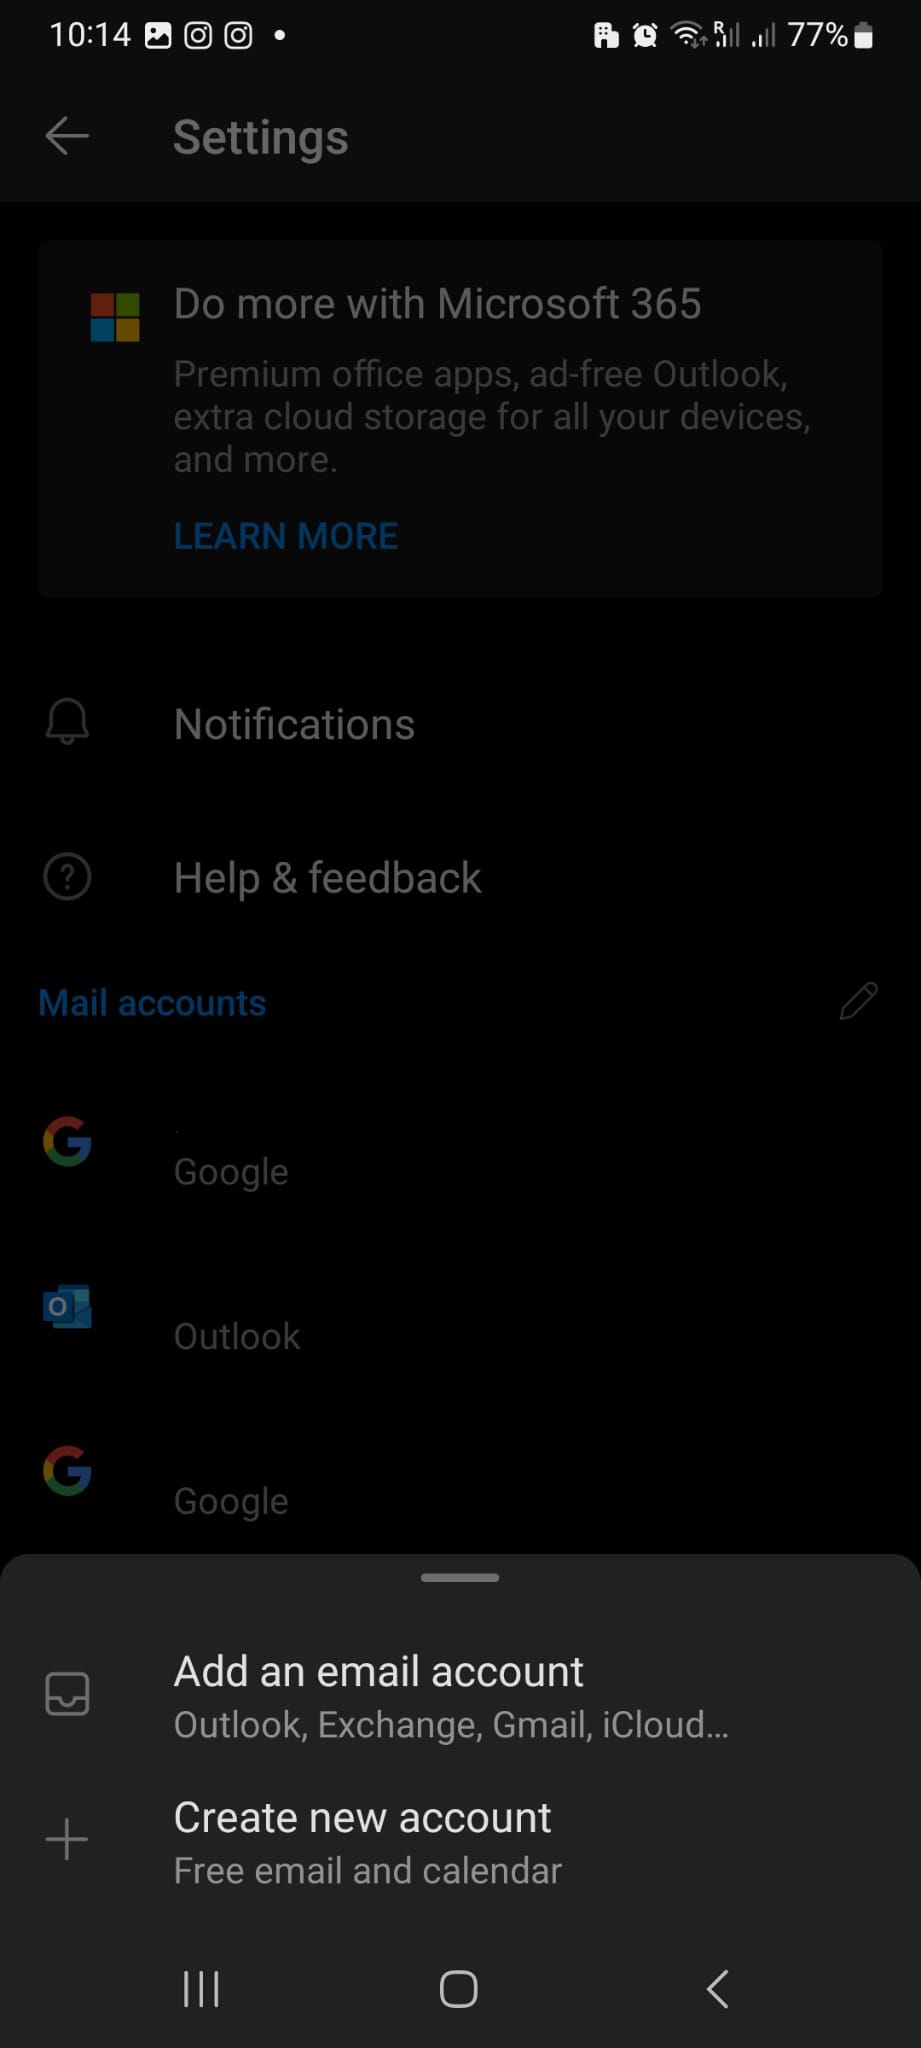
After tapping + ADD MAIL ACCOUNT, a pop-up will appear from the bottom of the screen. Choose Add an email account. You will then be taken to an Add Account screen.
6
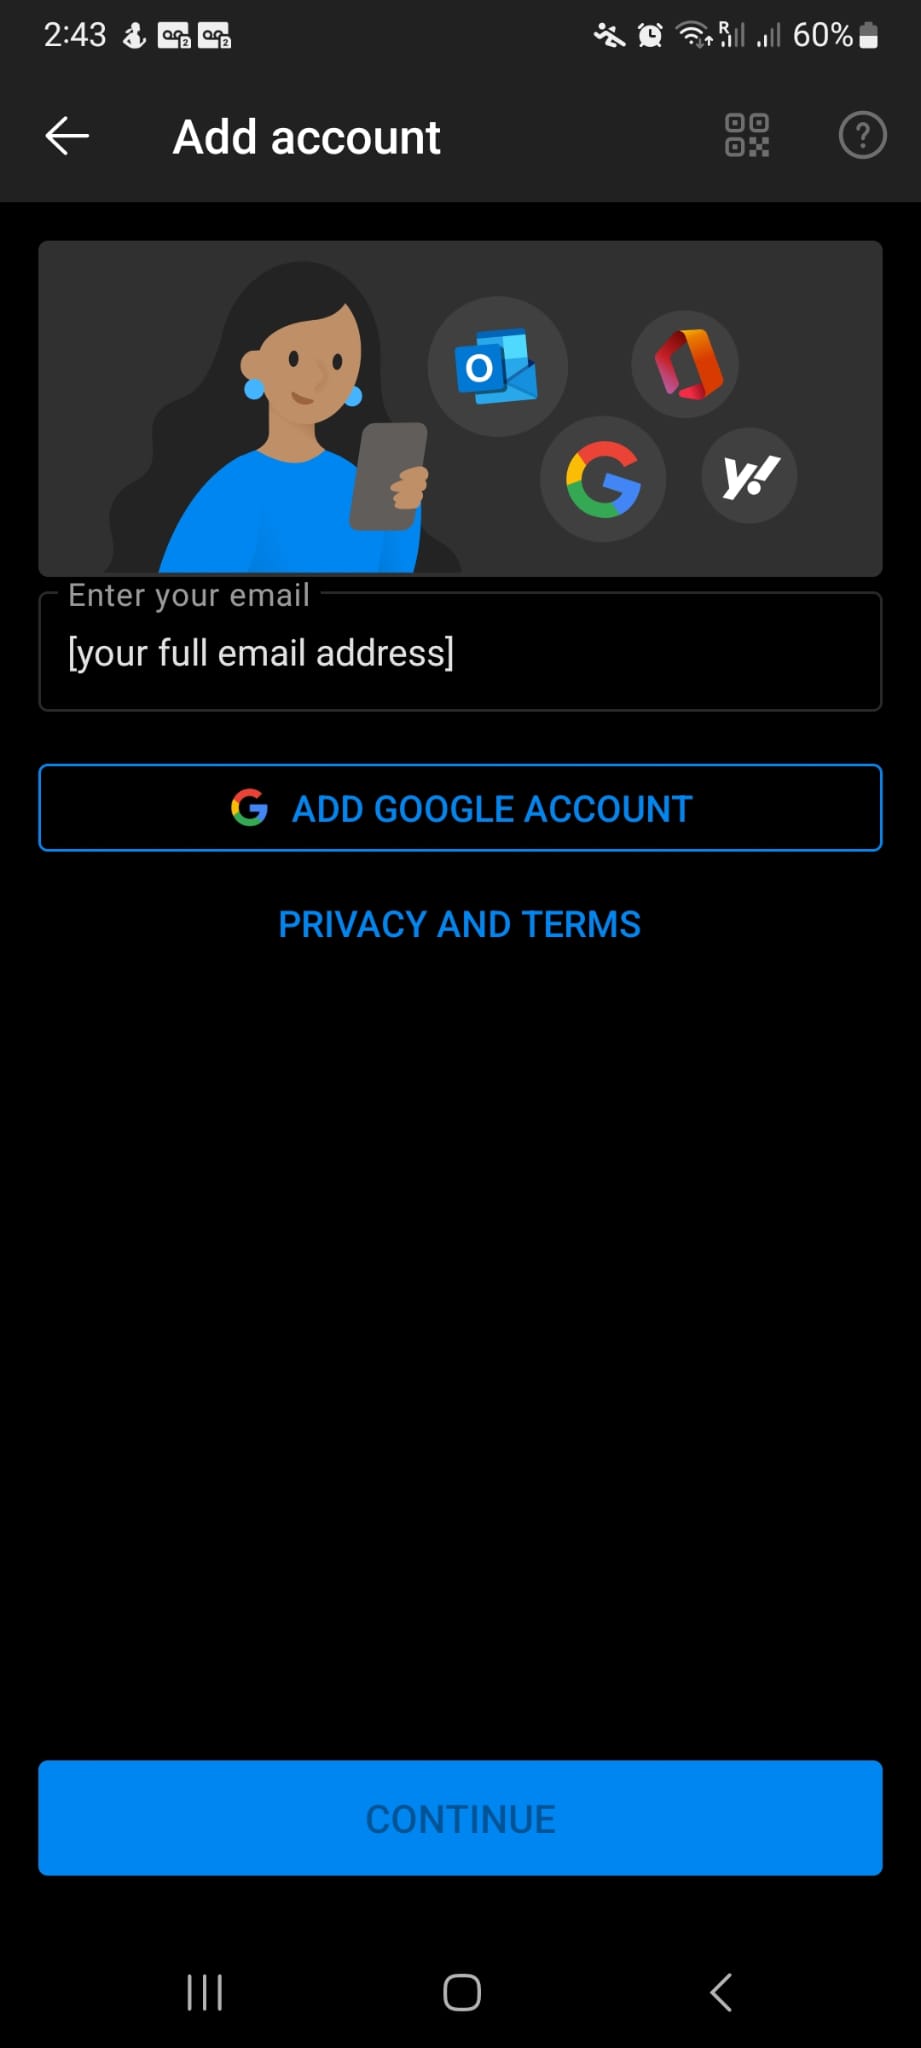
On the Add Account screen enter the email address provided by Caribbean New Media (CNM). On completion, tap CONTINUE.
7
After tapping CONTINUE, a popup will appear from the bottom of the screen. For the purpose of adding an email from CNM, please choose POP3 or IMAP. You will be then taken to the Connect POP3 or Connect IMAP screen.

8
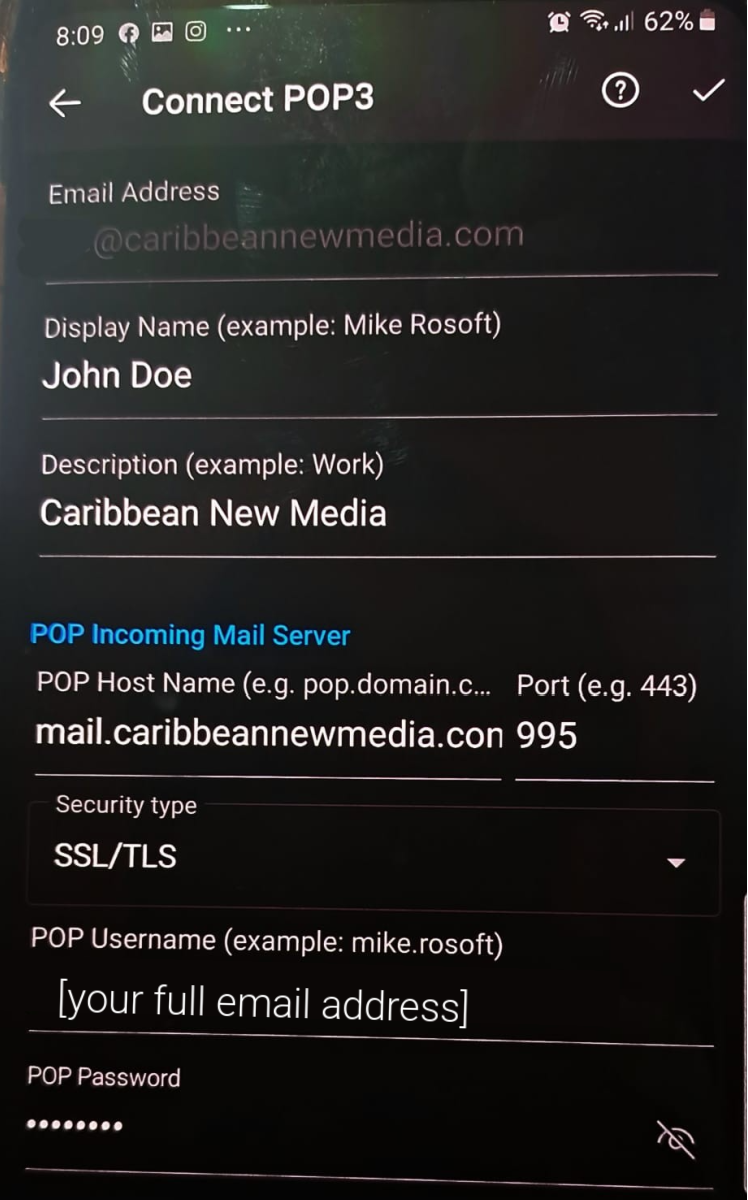
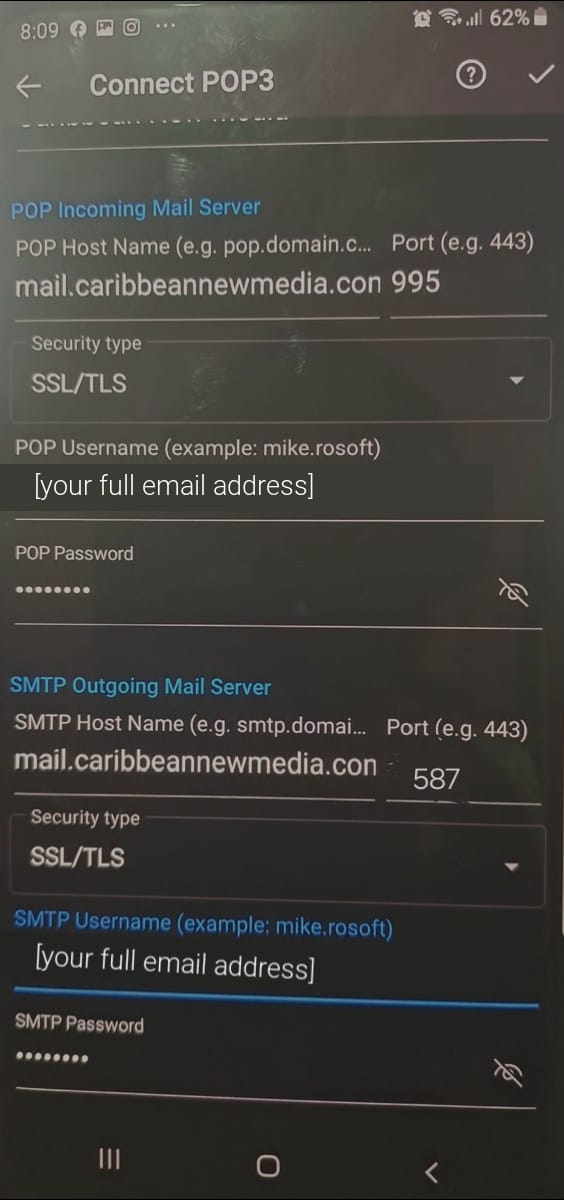
On the Connect POP3 or Connect IMAP screen, type in the Display Name and Description. On completion move on to the POP Incoming Mail Server and POP Outgoing Mail Server sections.
9
Use the screen below as a guide to fill in the fields for the POP Incoming Mail Server and POP Outgoing Mail Server sections. The POP Username and POP Password should match the email address and password provided by CNM. On completion tap the ✓ on the top right of the screen.
10
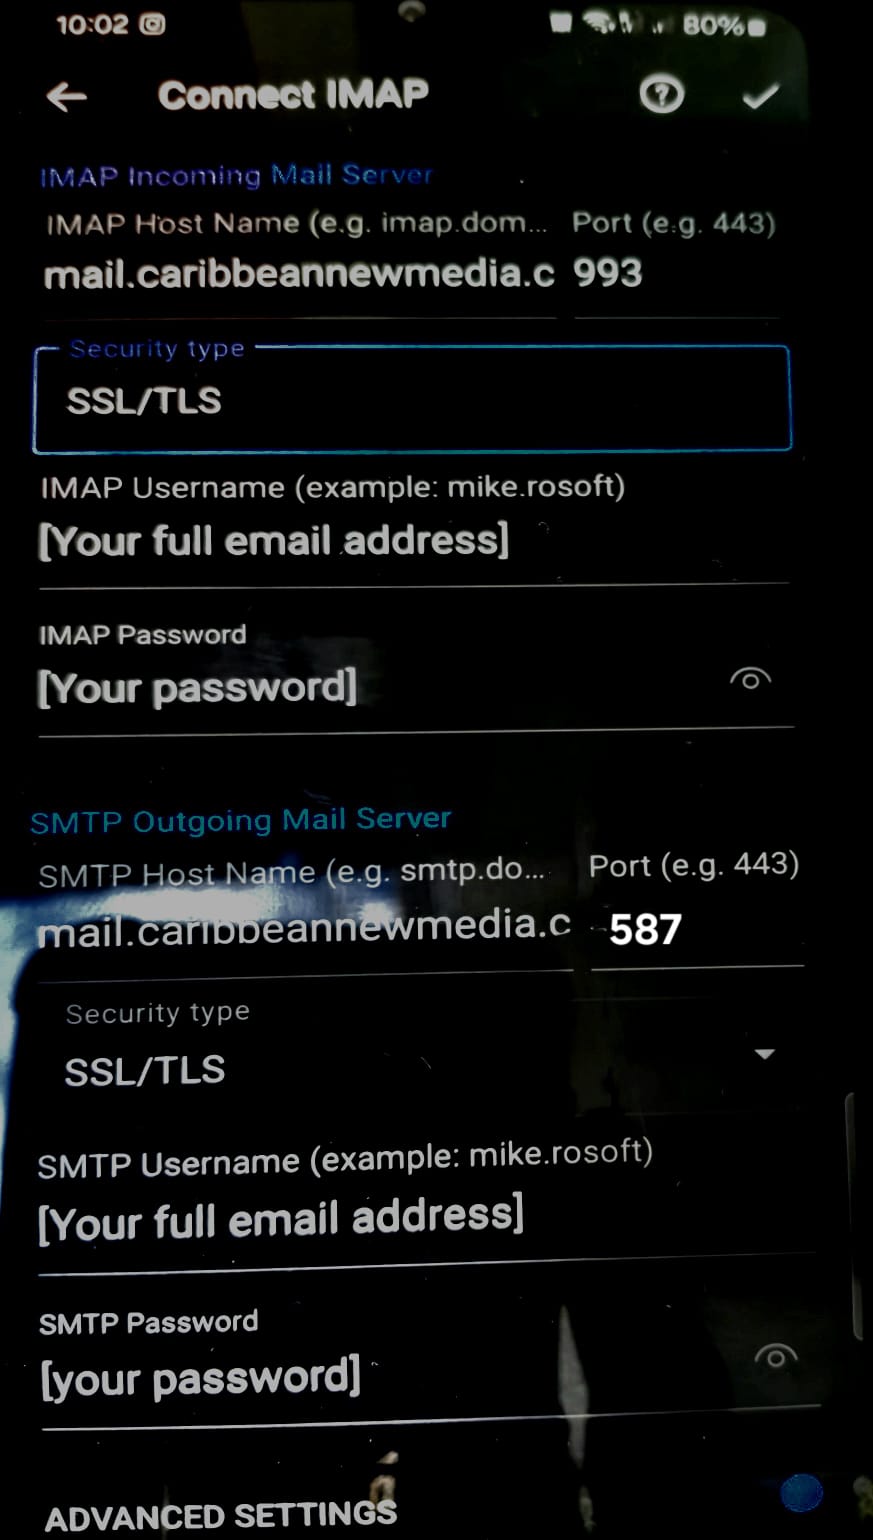
Use the screen below as a guide to fill in the fields for the IMAP Incoming Mail Server and IMAP Outgoing Mail Server sections. The IMAP Username and IMAP Password should match the email address and password provided by CNM. On completion tap the ✓ on the top right of the screen.
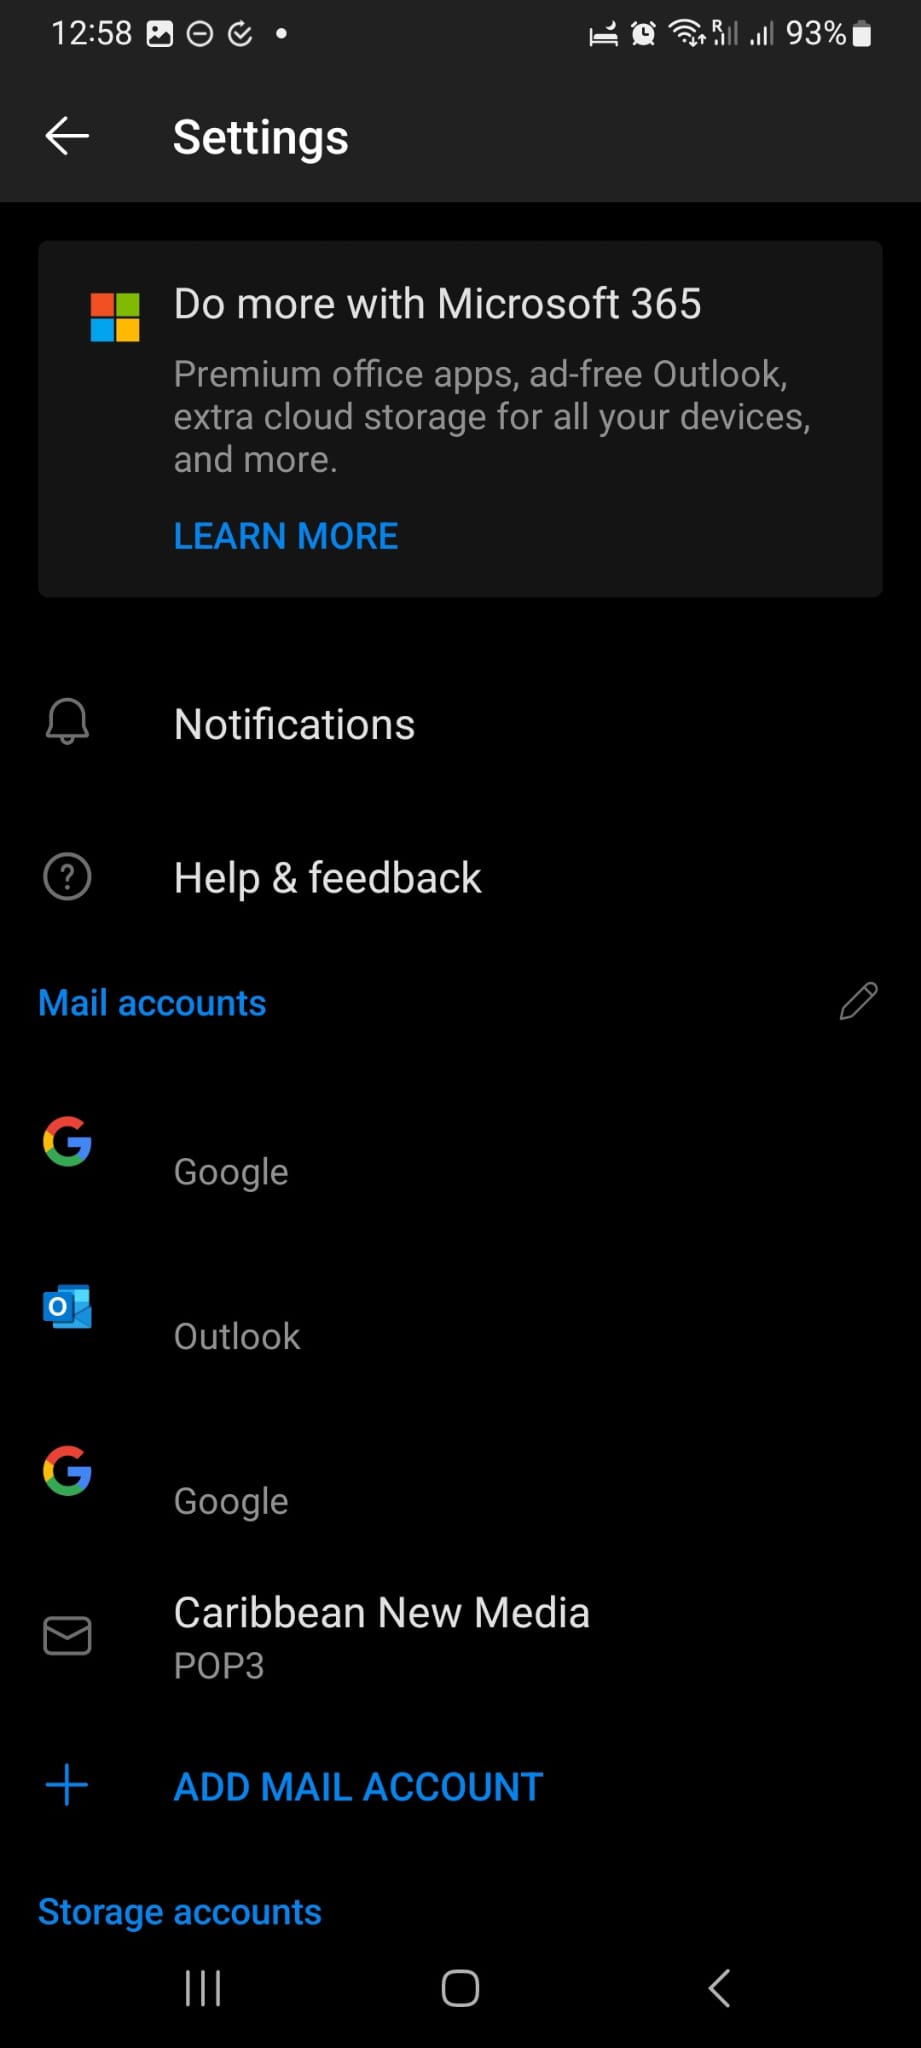
11
If all the steps were followed correctly, your CNM mail will now have been added successfully and listed under the Mail Accounts. Your inbox should begin populating.
Guide to Android mail setup.
Android mail apps may look different across different devices, and these directions may not exactly match the options you see. Use these steps as a guide or consult the manufacturer's help for your particular device.
Requirements
Before you start be sure to have these handy:
- Email Address: The full email address for the mailbox you have set up in Plesk, e.g. yourname@caribbeannewmedia.com
- User Name: The full email address for the mailbox you have set up in Plesk, e.g. yourname@caribbeannewmedia.com
- Outgoing Port: 587
- POP3 Server: For the Incoming Server use "mail.caribbeannewmedia.com"
- POP3 Incoming Port: 995
- IMAP Server: For the Incoming Server use "mail.caribbeannewmedia.com"
- IMAP Incoming Port: 993
- SMTP Server: For the Outgoing Server use "mail.caribbeannewmedia.com"
- Password: The password you set in the mailbox preferences within Plesk.
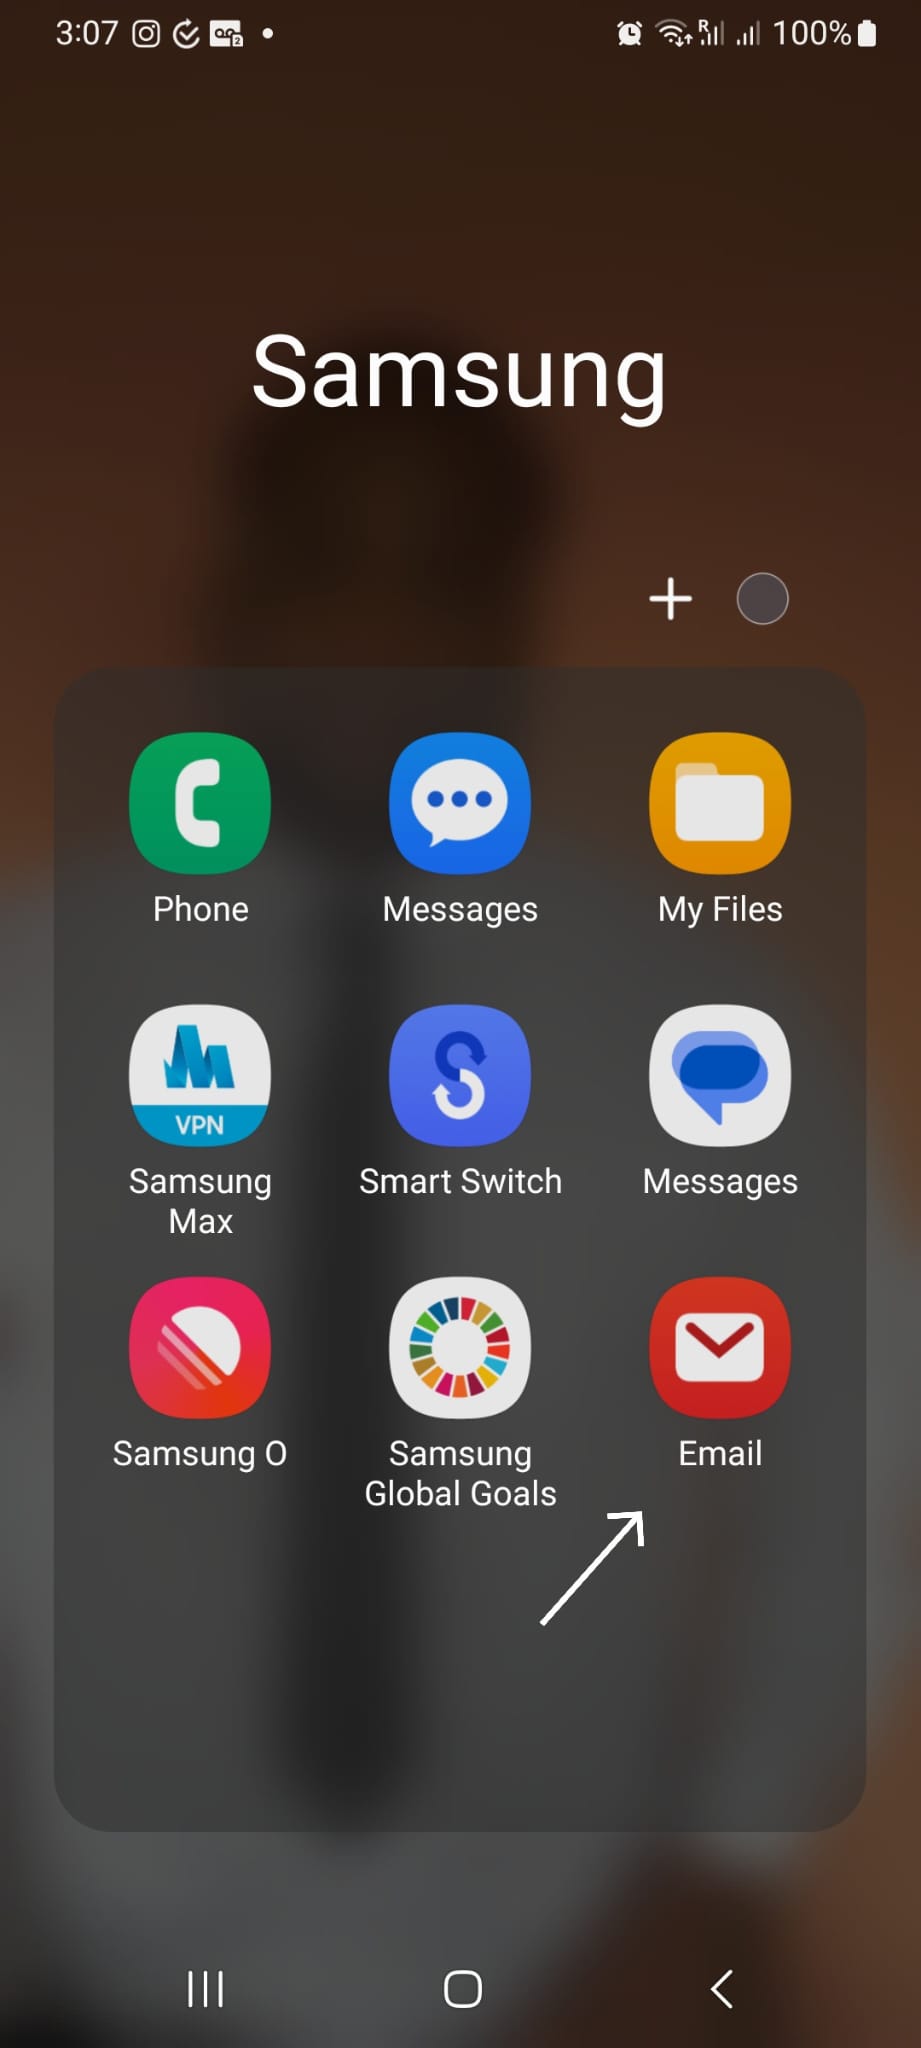
1
On your Samsung Android device find and open the Samsung email App.
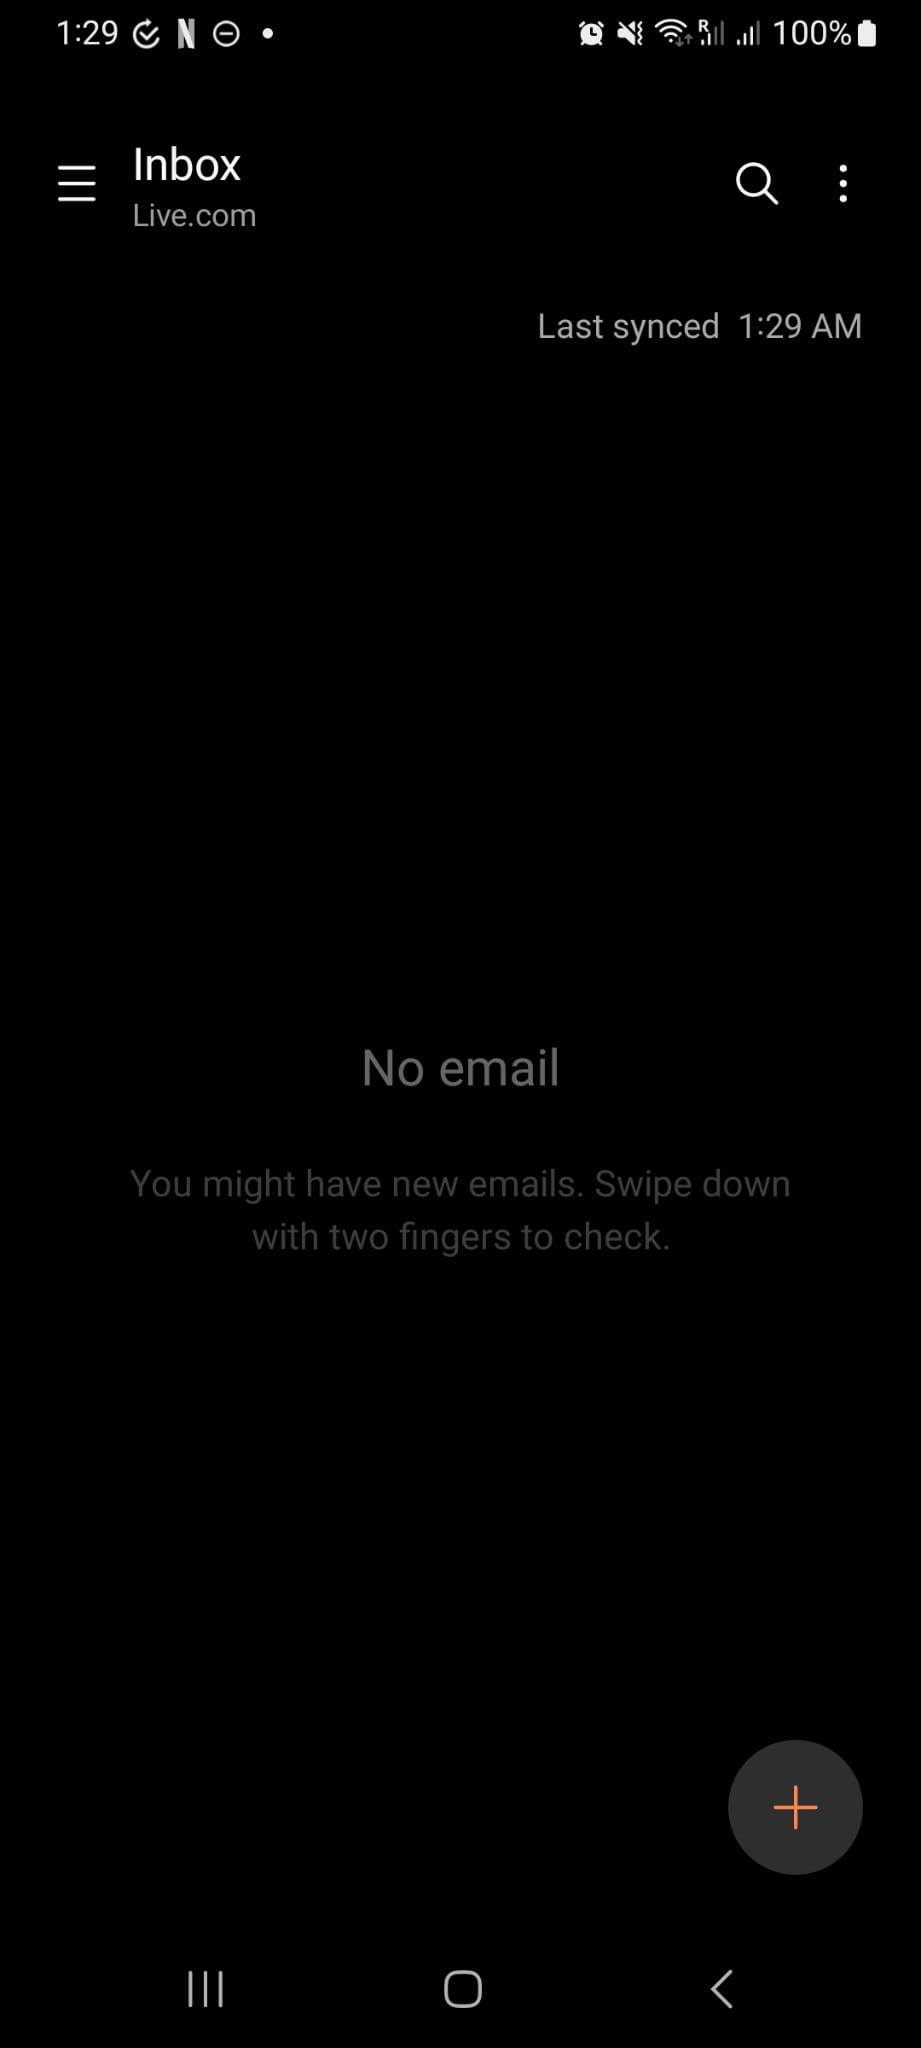
2
When the App is open you will be presented with a similar screen. Tap the menu bar in the top left of the screen.
3
On the menu, click the gear icon in the top right corner. This will take you to an email settings screen.
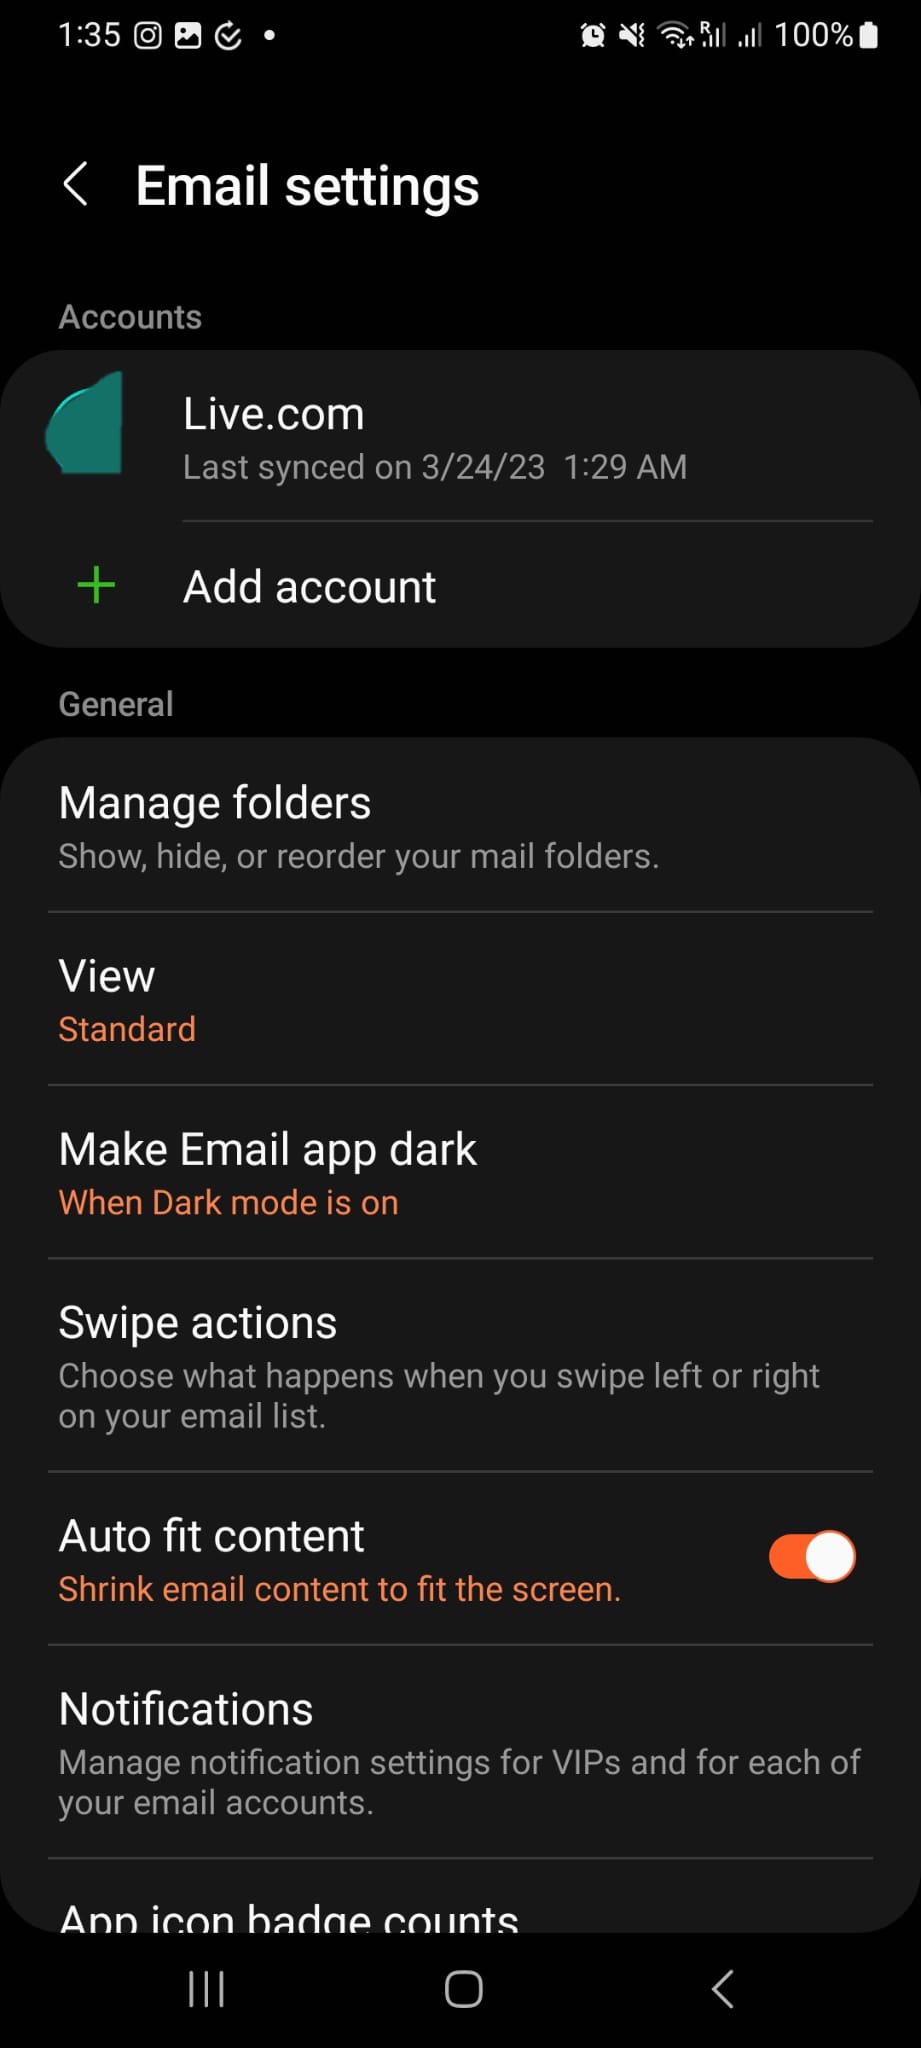
4
On the email settings screen, tap Add Account. You will then be taken to a setup email screen.
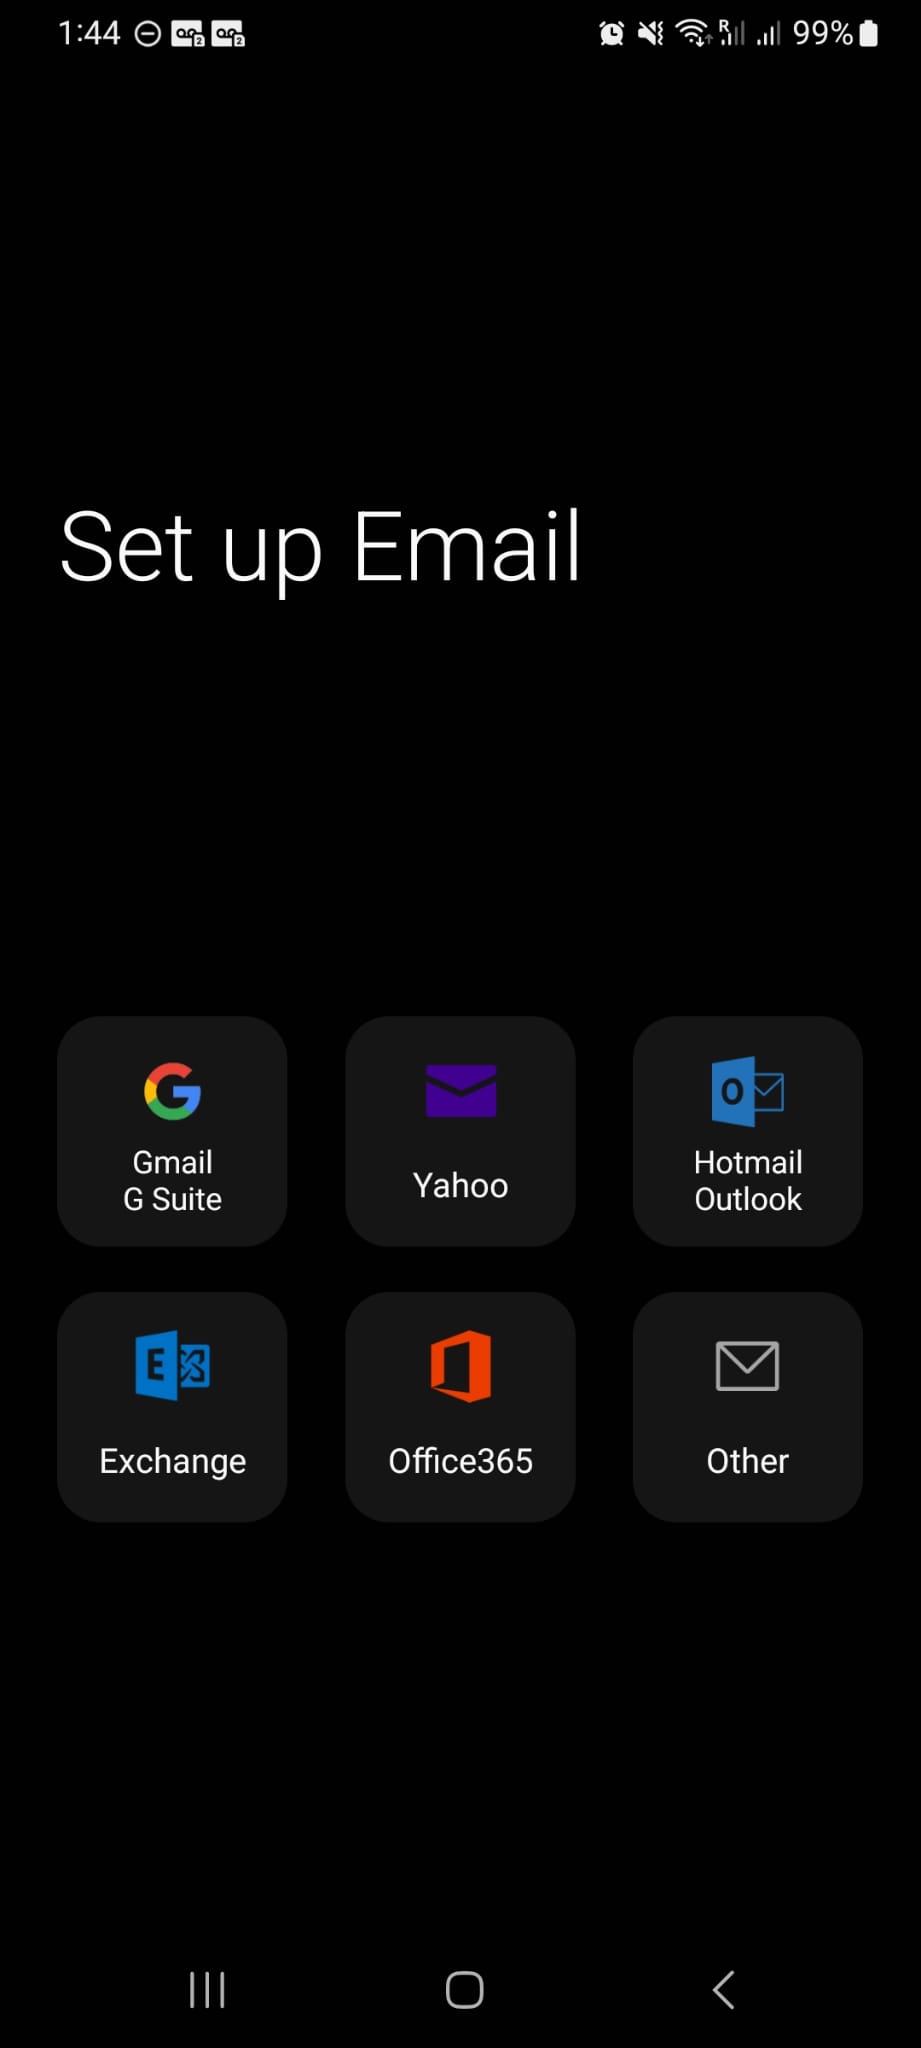
5
On the Set up Email page choose the Other. You will then be taken to the sign-up screen.
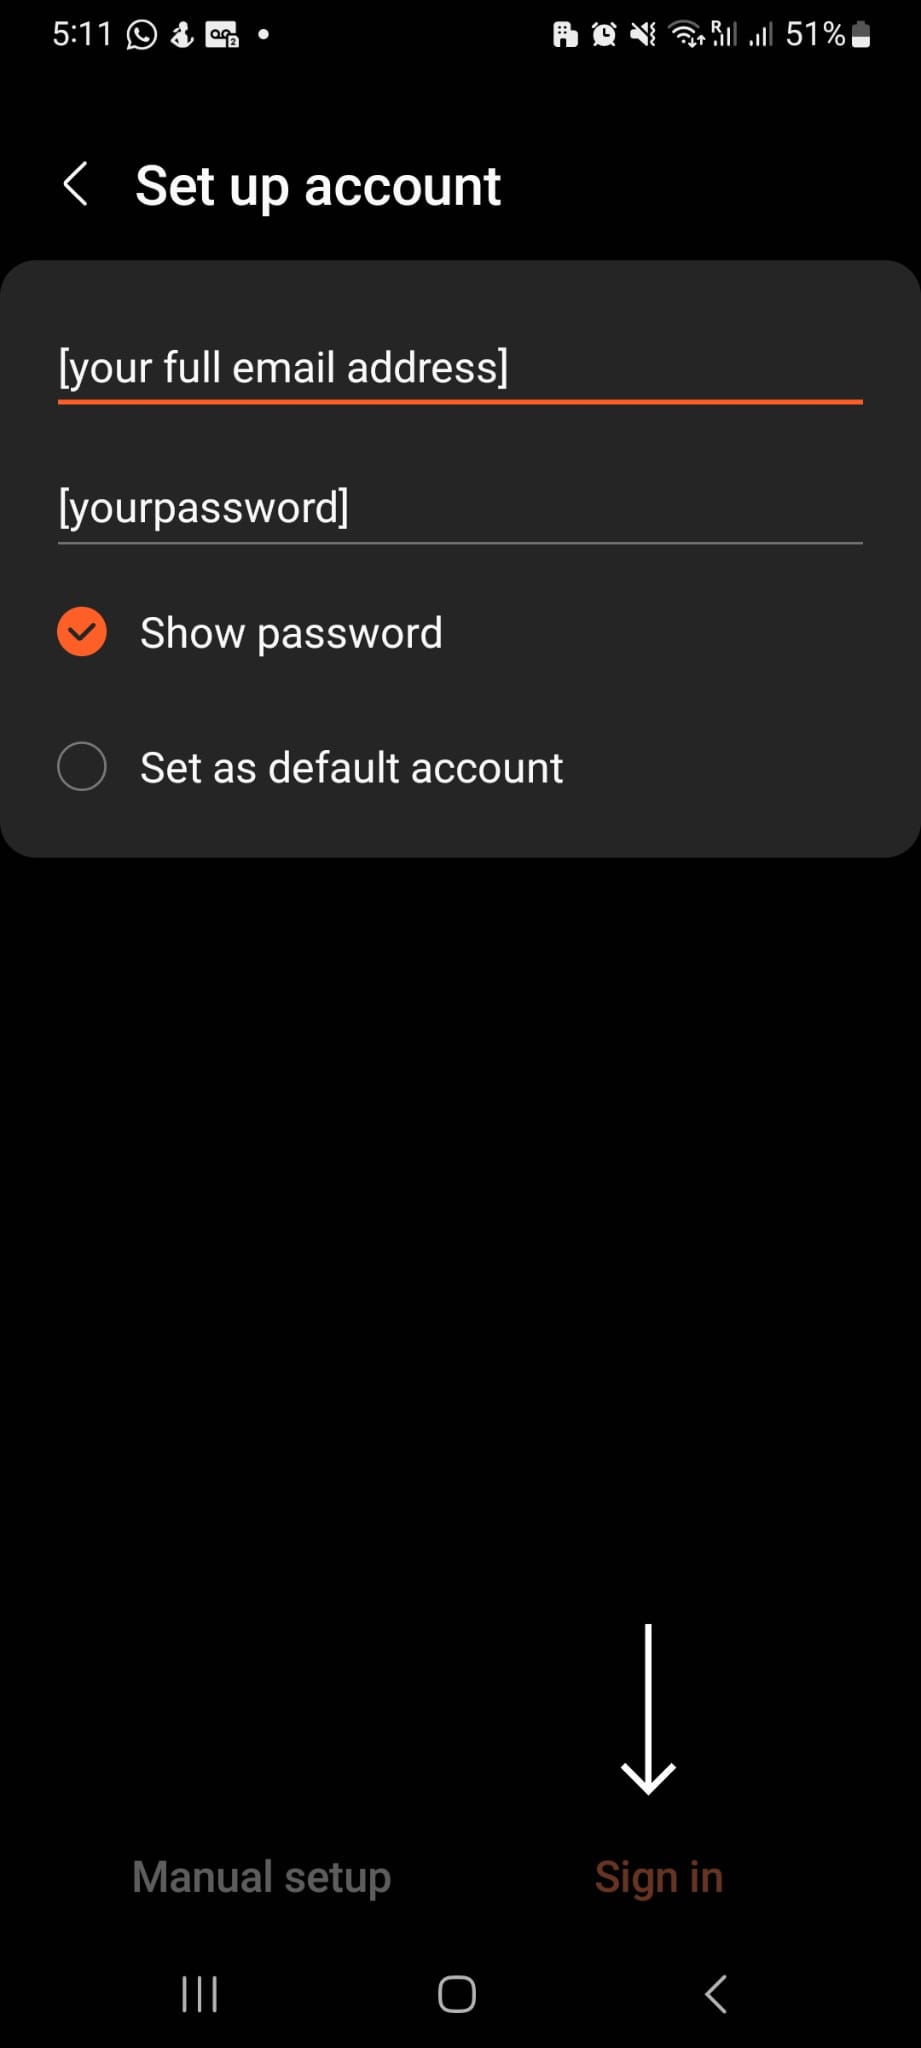
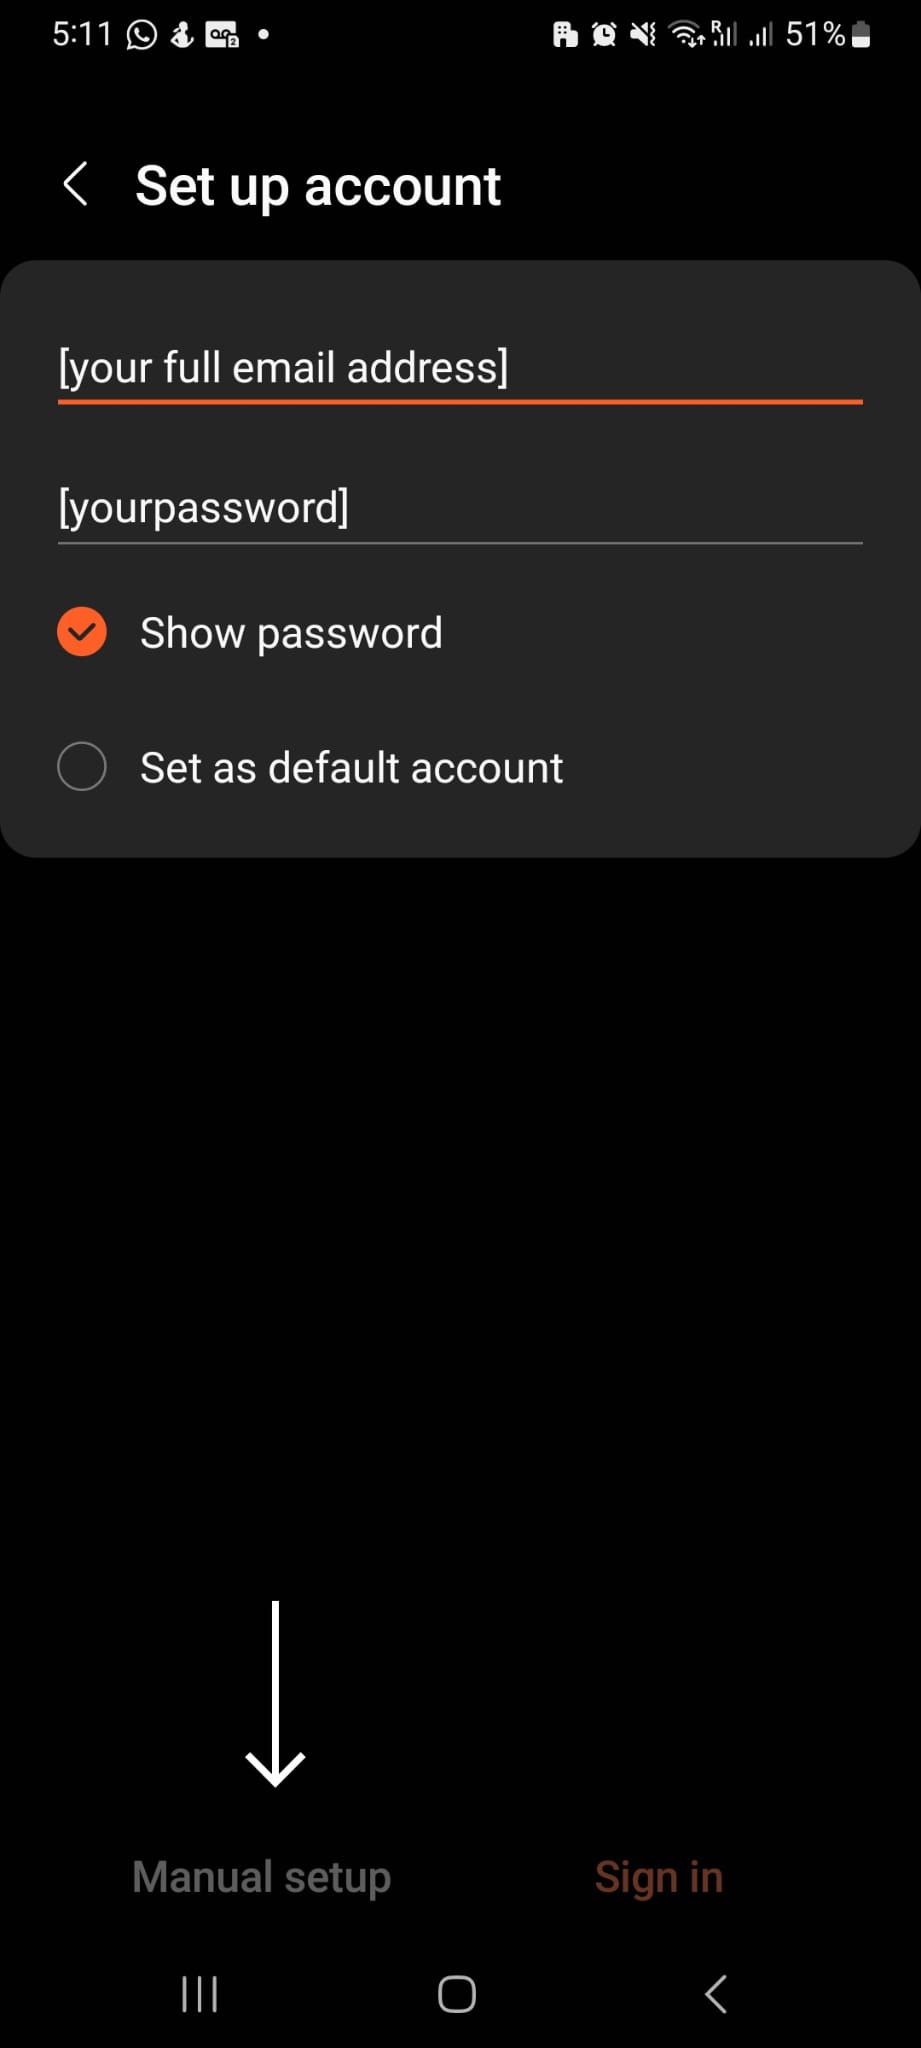
6
On the sign-up screen enter the email address and password you were provided. Upon completion tap Sign In. A pop-up screen will then indicate that the settings are being automatically applied. This may take a few seconds or minutes depending on the speed of your internet.
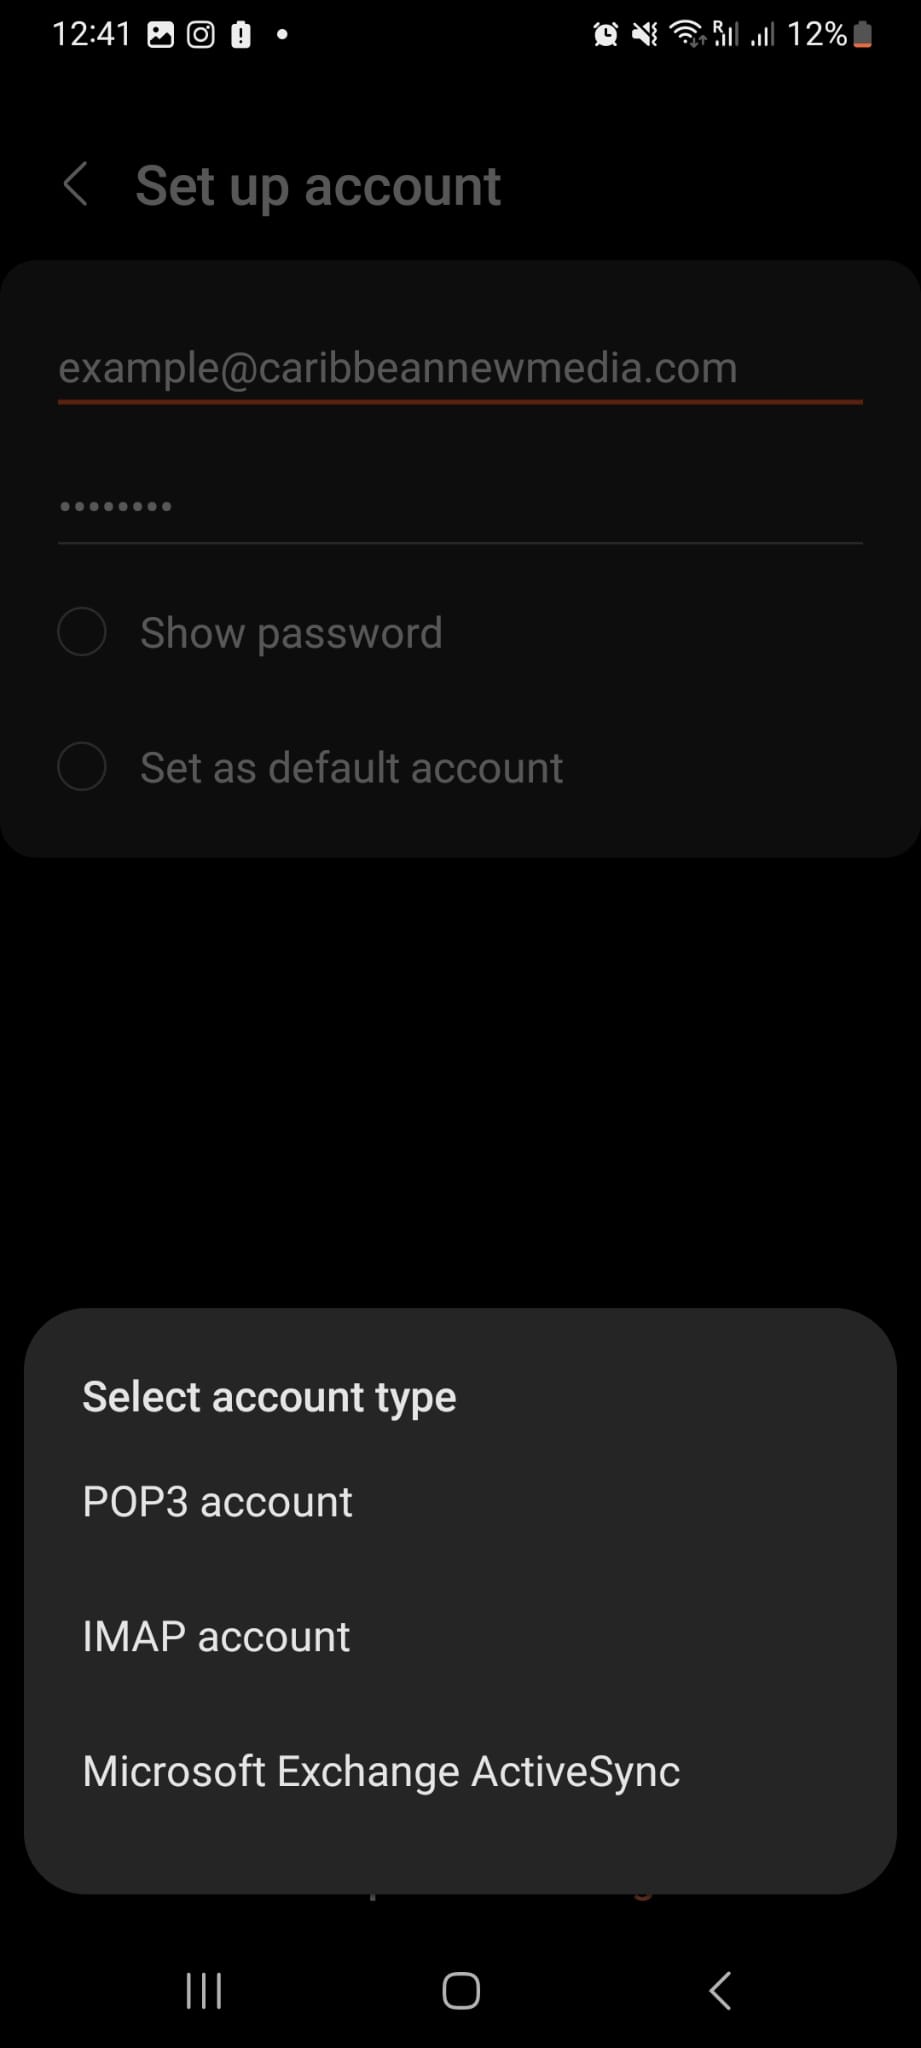
7
After the automatic setup has been completed, a pop-up instructing the user to select an account type will appear on the screen. For the purposes of setting up your Caribbean New Media (CNM) mailing account, choose POP3. The user should then be taken to the server settings screen.
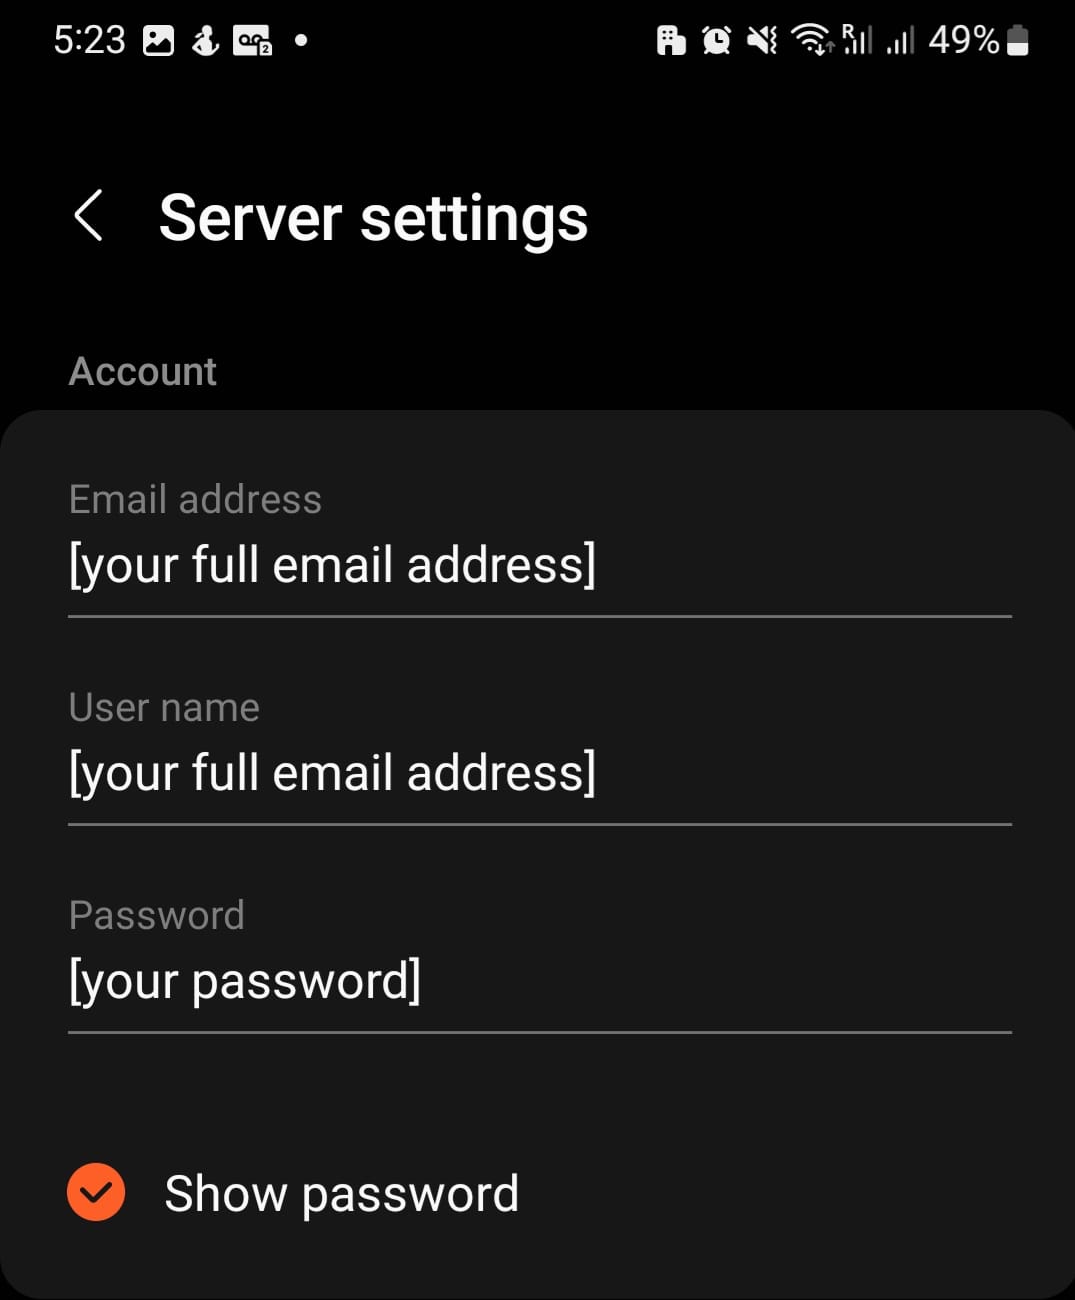
8
On the server settings, there are three sections to enter information; Account, Incoming Server, and Outgoing Server. Under the Account section, ensure that the CNM username and password are the same. The user can then keep the username provided or change it if desired.
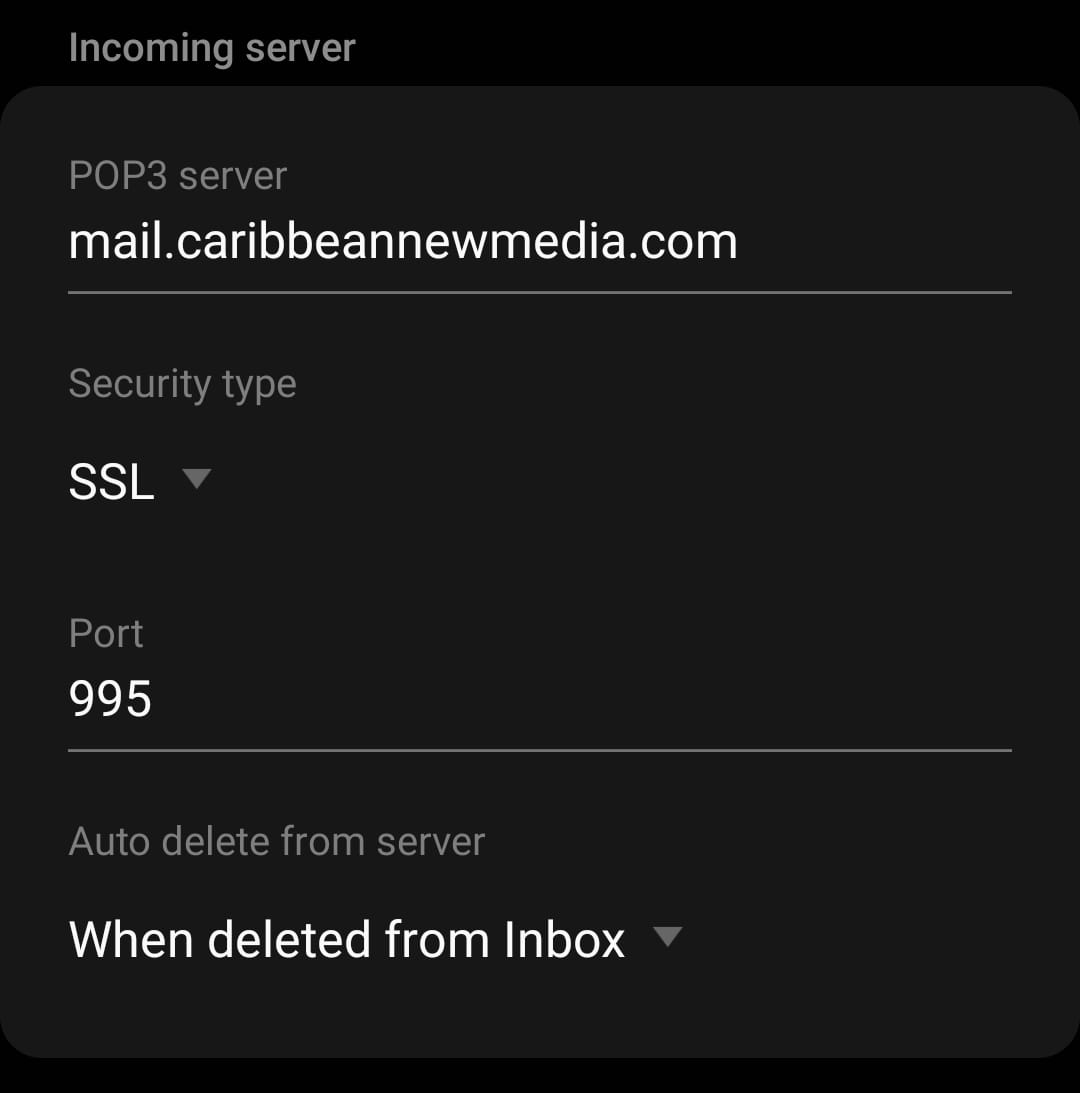
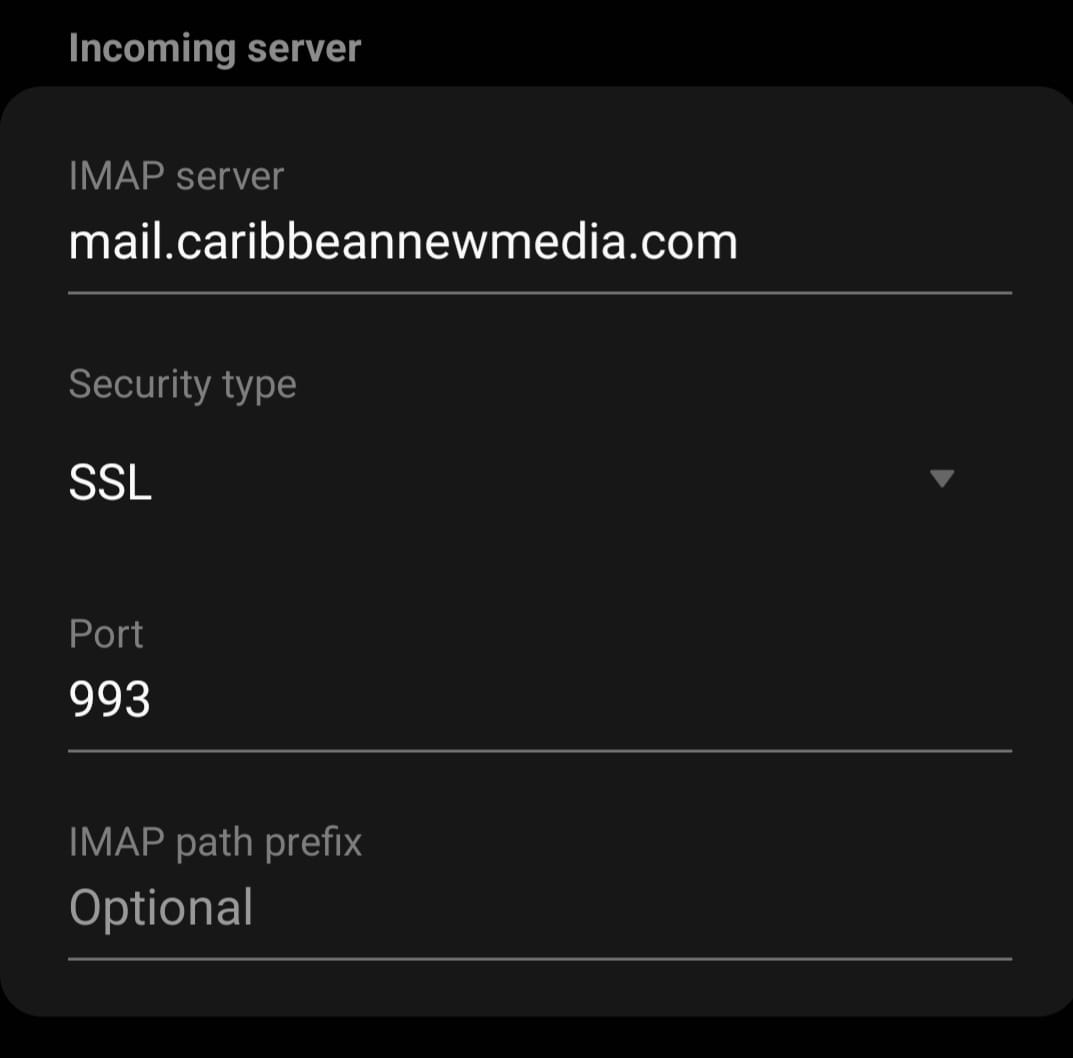
9
Under the Incoming Server, section edit each field to match the image provided. Upon completion move to the next section.
10
Under the Outgoing Server, section edit each field to match the image provided. Upon Completion tap done. If the instructions were followed correctly, your CNM email should be completely set up and the mailbox should start populating. If an error persists, move to the Manual settings section.

Guide to Apple mail setups.
Apple Mail is the default email client that comes with every IOS using OS X 10.0 or later. This guide will show you how to configure your Apple Mail application to access email for your Caribbean New Media Account.
Requirements
Before you start be sure to have these handy:
- Name: However you wish your name to appear in recipients' email programs, this will either be your FIRSTNAME LASTNAME or, your COMPANY NAME
- Email: The full email address for the mailbox you have set up in Plesk, e.g. yourname@caribbeannewmedia.com
- Description: This field is usually auto-filled with the domain name of the email address but can be changed.
- Host Name: For Incoming and Outgoing Servers use "mail.caribbeannewmedia.com"
- User Name: The full email address for the mailbox you have set up in Plesk, e.g. yourname@caribbeannewmedia.com
- Password: The password you set in the mailbox preferences within Plesk.
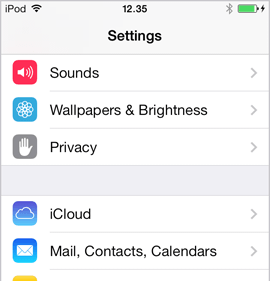
1
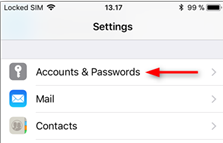
First, you need to go into settings. On some iPhones, this is "Mail, Contacts and Calendars" On other iPhones this is simply "Mail" and on other types, it is "Accounts and Passwords". You will be taken to the Mail, Mail, Contacts, and Calendars or Accounts and Passwords, respectively.

2
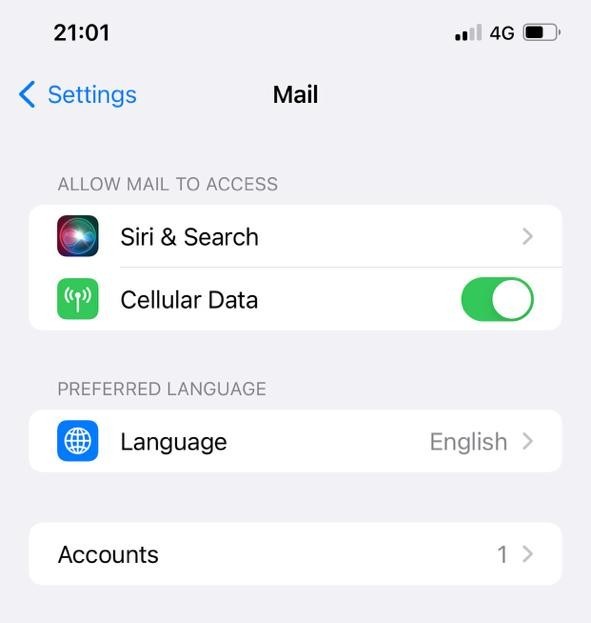
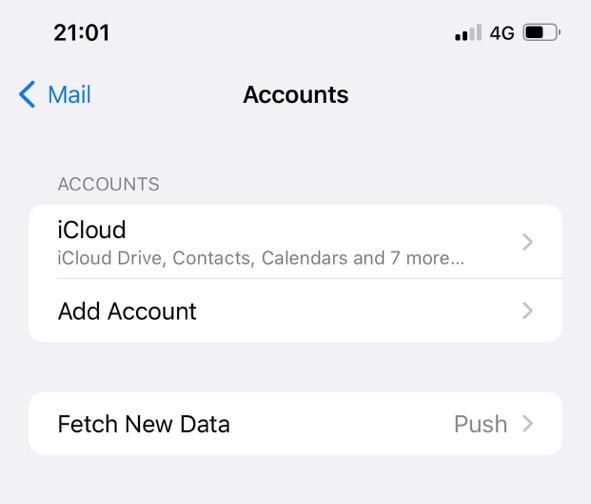
On the Mail screen tap Accounts or Add Account. You will then be taken to an Accounts screen.
3
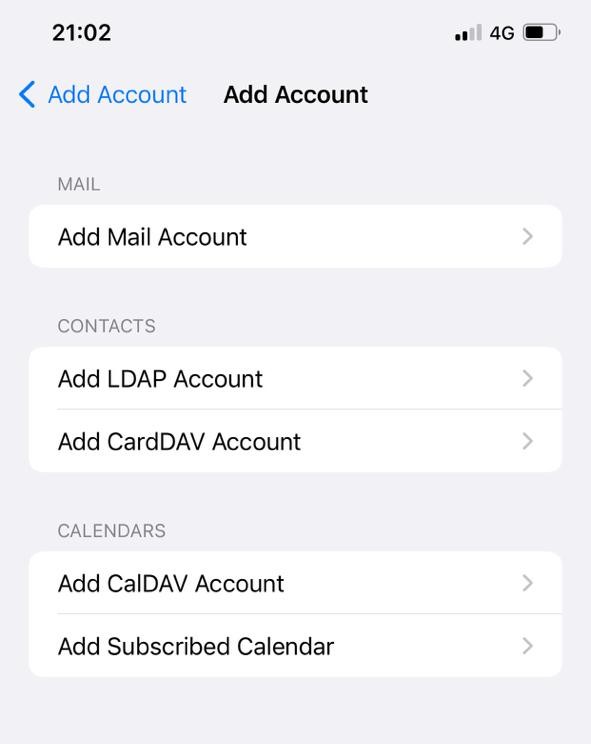
On the Accounts screen, tap Add Mail Account. You will then be taken to a screen with multiple mail accounts.
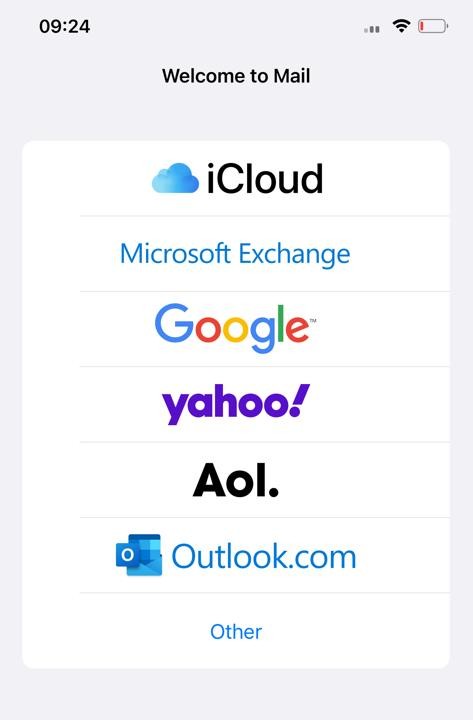
4
On the multiple mail account choices, choose Other. You will be taken to a New Account.
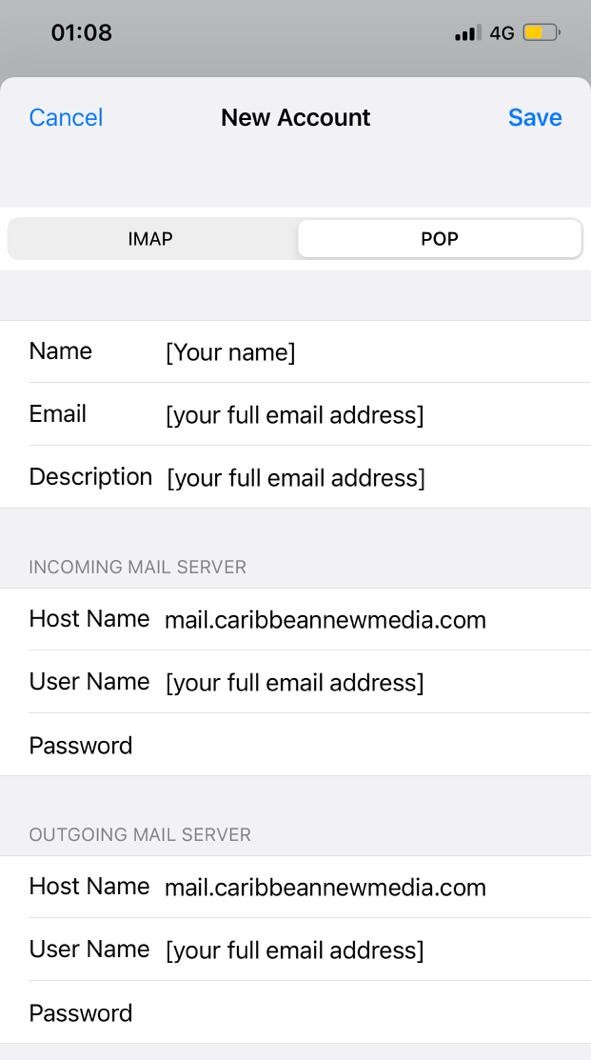
5
On the New Account screen, tap on the POP or IMAP tab. On the POP tab, fill in all the fields with the information provided by CNM. use the image below as a guide to fill in the details.
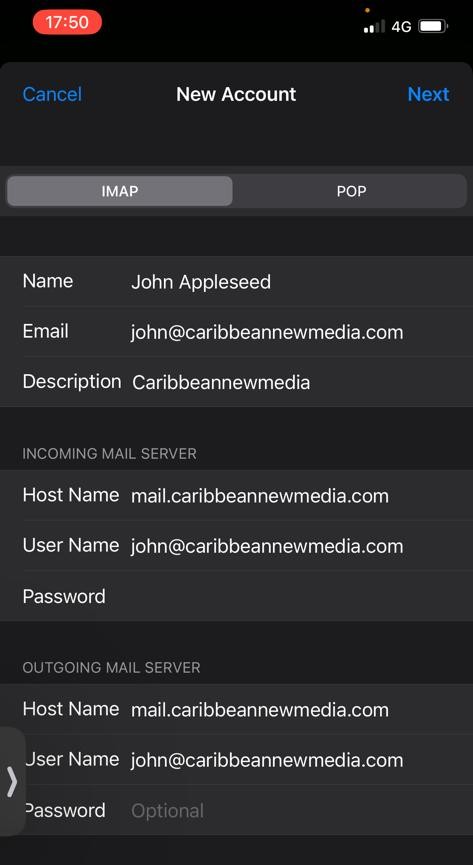
6
On the New Account screen, tap on the POP tab. On the IMAP tab, fill in all the fields with the information provided by CNM. use the image below as a guide to fill in the details.
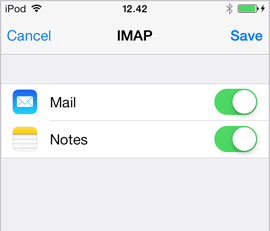
7
After entering all the information provided tap Save on the top right of the screen. The mailing information will be verified and then a screen similar to the below will be presented on screen. If you see the screen below your Caribbean New Media account was set up successfully.
Guide to webmail setup.
Webmail is an email service provided by Caribbean New Media. The Webmail service allows users to access their email using a standard browser. This guide will show you how to configure your Webmail to access email for your Caribbean New Media Mail Account.
Requirements
Before you start be sure to have these handy:
- Username: The full email address for the mailbox you have set up in Plesk, e.g. yourname@caribbeannewmedia.com
- Password: The password you set in the mailbox preferences within Plesk.
1
First, open up your favourite browser and search for the site Webmail. You will be taken to a login screen similar to the image below. On the Username field enter your full email address. Then Password field and enter your password. When both fields have been filled click the Login button.

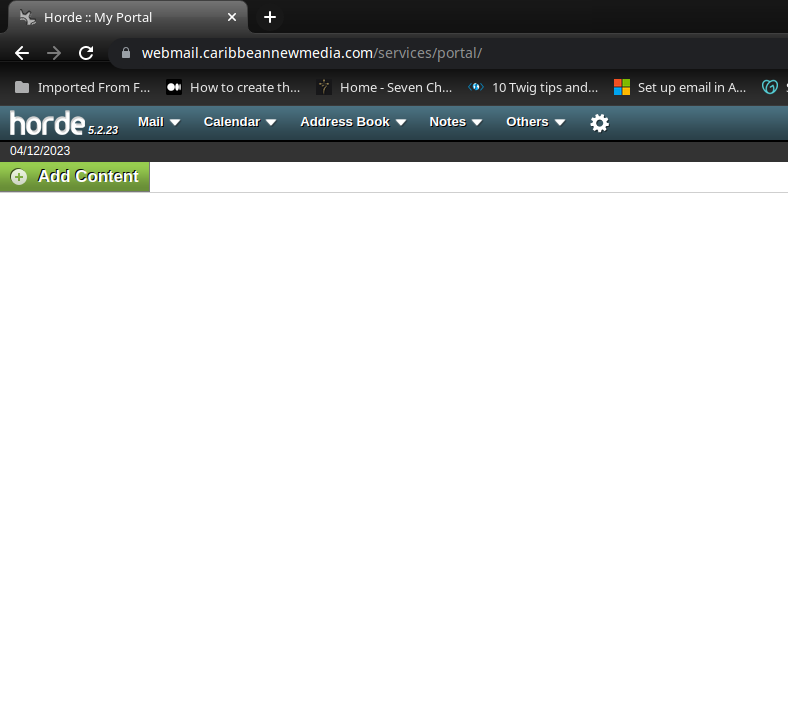
2
If the login was successful, you should then be taken to a webpage similar to the image below. on this webpage to access your mail, click on the first item on the navigation menu labelled Mail. You will then be taken directly to your inbox.
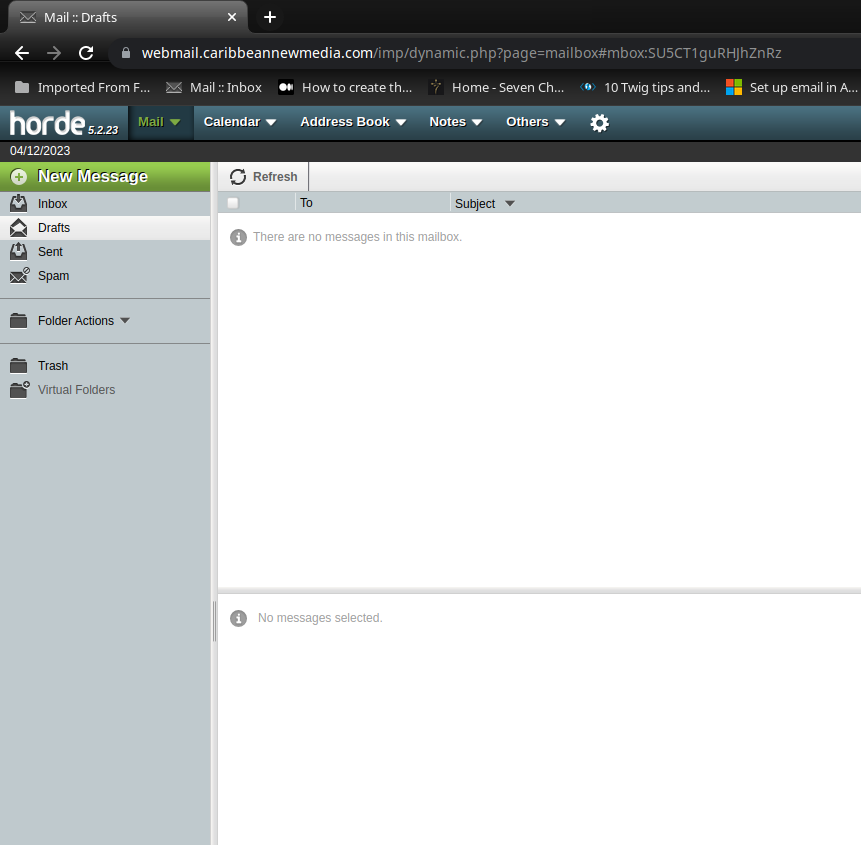
3
On the web page containing your mail, you should be able to access your Inbox, Drafts, Sent, and Spam folder. Additionally, you can create new emails by clicking the button labelled ⊕ New Message.
If you’re still unable to set up your email, try the Manual Setup for Samsung Email app steps below:
Manual setup in the Samsung Email app ⋀
1
Follow the same steps above up to step 5. On step 6 choose Manual setup.
2
A pop-up will appear prompting the user to select an account type. For the purpose of setting up your Caribbean New Media (CNM) mailing account, choose POP3 or IMAP. The user should then be taken to the server settings screen.
3
On the server settings, there are three sections to enter information; Account, Incoming Server, and Outgoing Server. Under the Account section, ensure that the CNM username and password are correct. The user can then keep the username provided or change it if desired.
4
If Pop3, under the Incoming Server section, edit each field to match the image provided. Upon completion move to the next section.
5
If IMAP, under the Incoming Server section, edit each field to match the image provided. Upon completion move to the next section.
6
Under the Outgoing Server, section edit each field to match the image provided. Upon Completion tap done. If the instructions were followed correctly, your CNM email should be completely set up and the mailbox should start populating. If an error persists, revisit the Manual settings section.